🤖 How do I use Workspaces to bring all my web resources together?
Workspaces are a place to get your web stuff organized. It could be for a specific project, for a particular client, or just a place to help keep things up-to-date.
🤖 Wavebox KnowHow Series
This article is part of a Wavebox blog series that breaks down our powerful productivity platform into bite-size features: More articles →
Workspaces are a place to get your web stuff organized. It could be for a specific project, for a particular client, or just a place to help you keep things up-to-date.
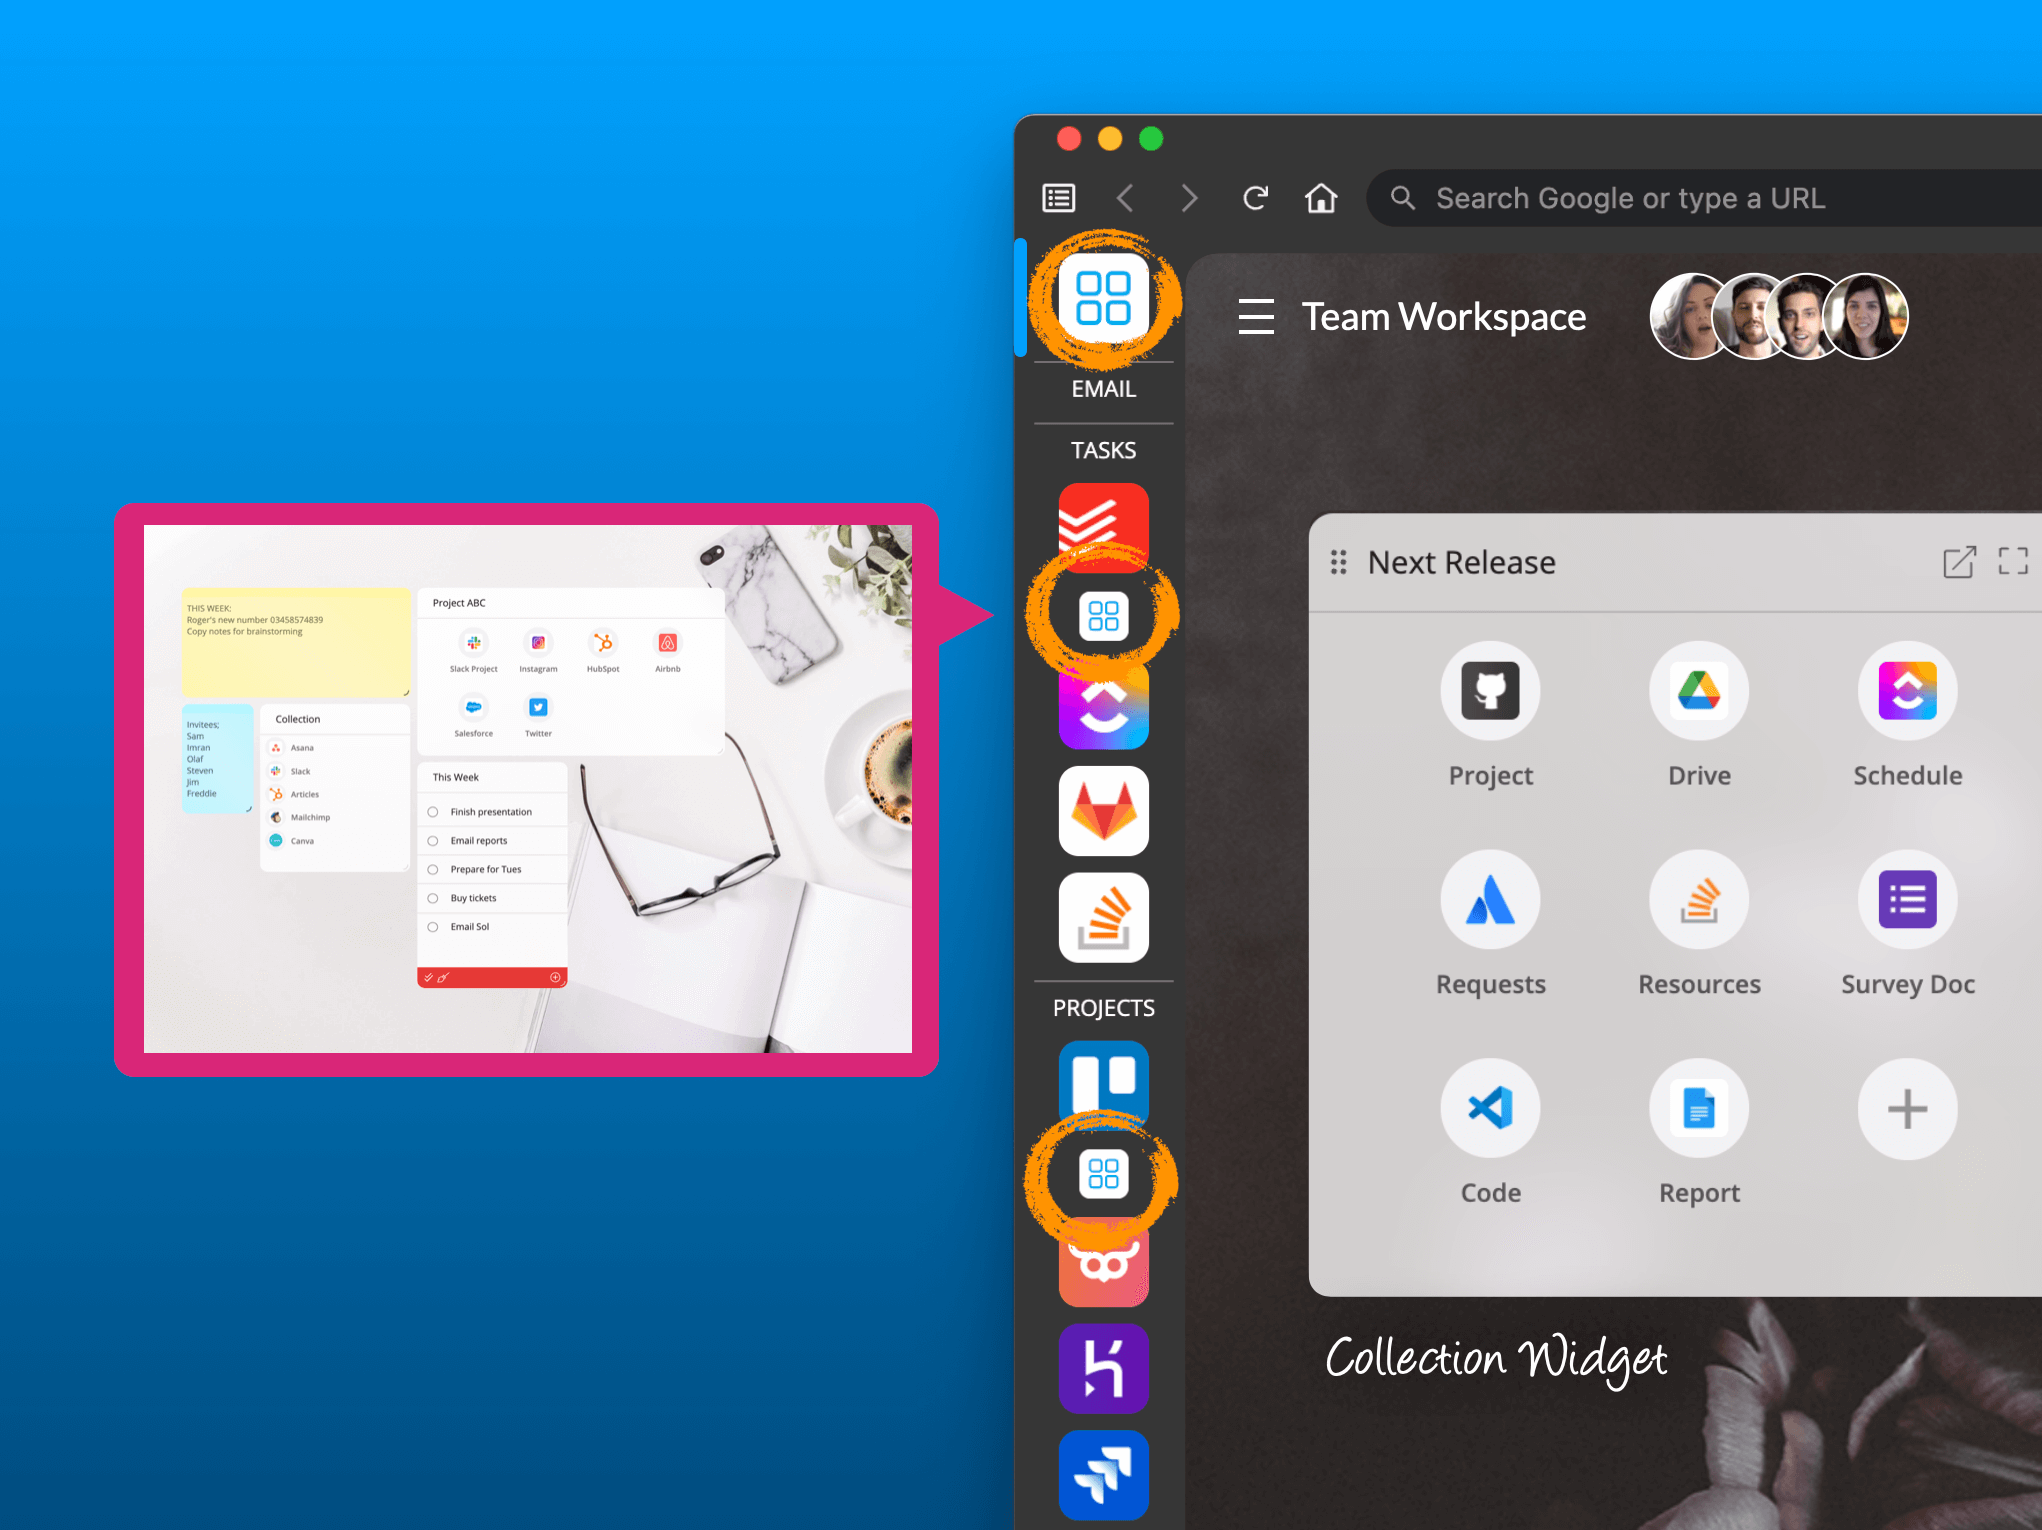
With a selection of great widgets to choose from—Tasks, Sticky Notes, and RSS Feed—you can curate a time-saving Workspace or multiple Workspaces to make your workday easier.
Here are some key pointers about Workspaces:
- Each Workspace fills the main window, just like a web page
- Create as many as you like
- Easily switch between them using the pop-out side menu
- Pin them to any group in the sidebar
- Select a Workspace to appear in new windows and tabs for any group
- Keep them private or share with a Connect team.
Getting Started
Click on the Workspace icon in the sidebar—it looks like four blue squares in a white square. New users will see a 'My First Workspace' example.
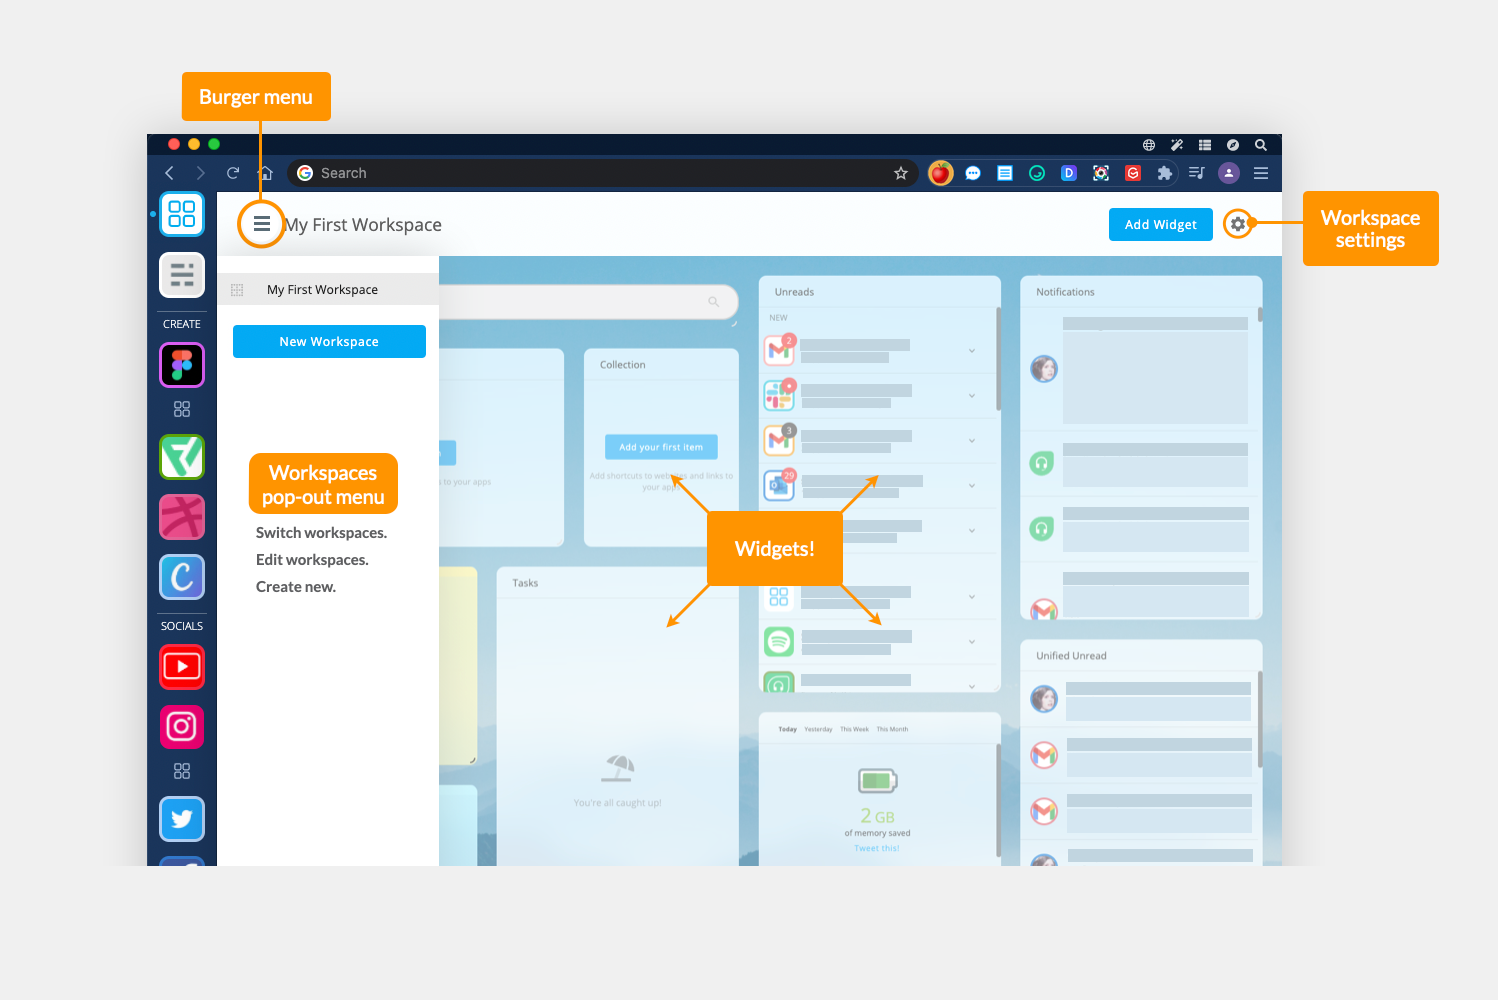
- Create & navigate Workspaces: Click on the Workspaces burger icon (three lines top-left) to show the Workspaces menu. From there, you can switch between your workspaces, edit and create Workspaces.
- Edit a Workspace: Highlight any Workspace in the pop-out menu, then click on the kebab icon (three dots) and select 'Edit.' From there, you can name your Workspace and make changes to the layout.
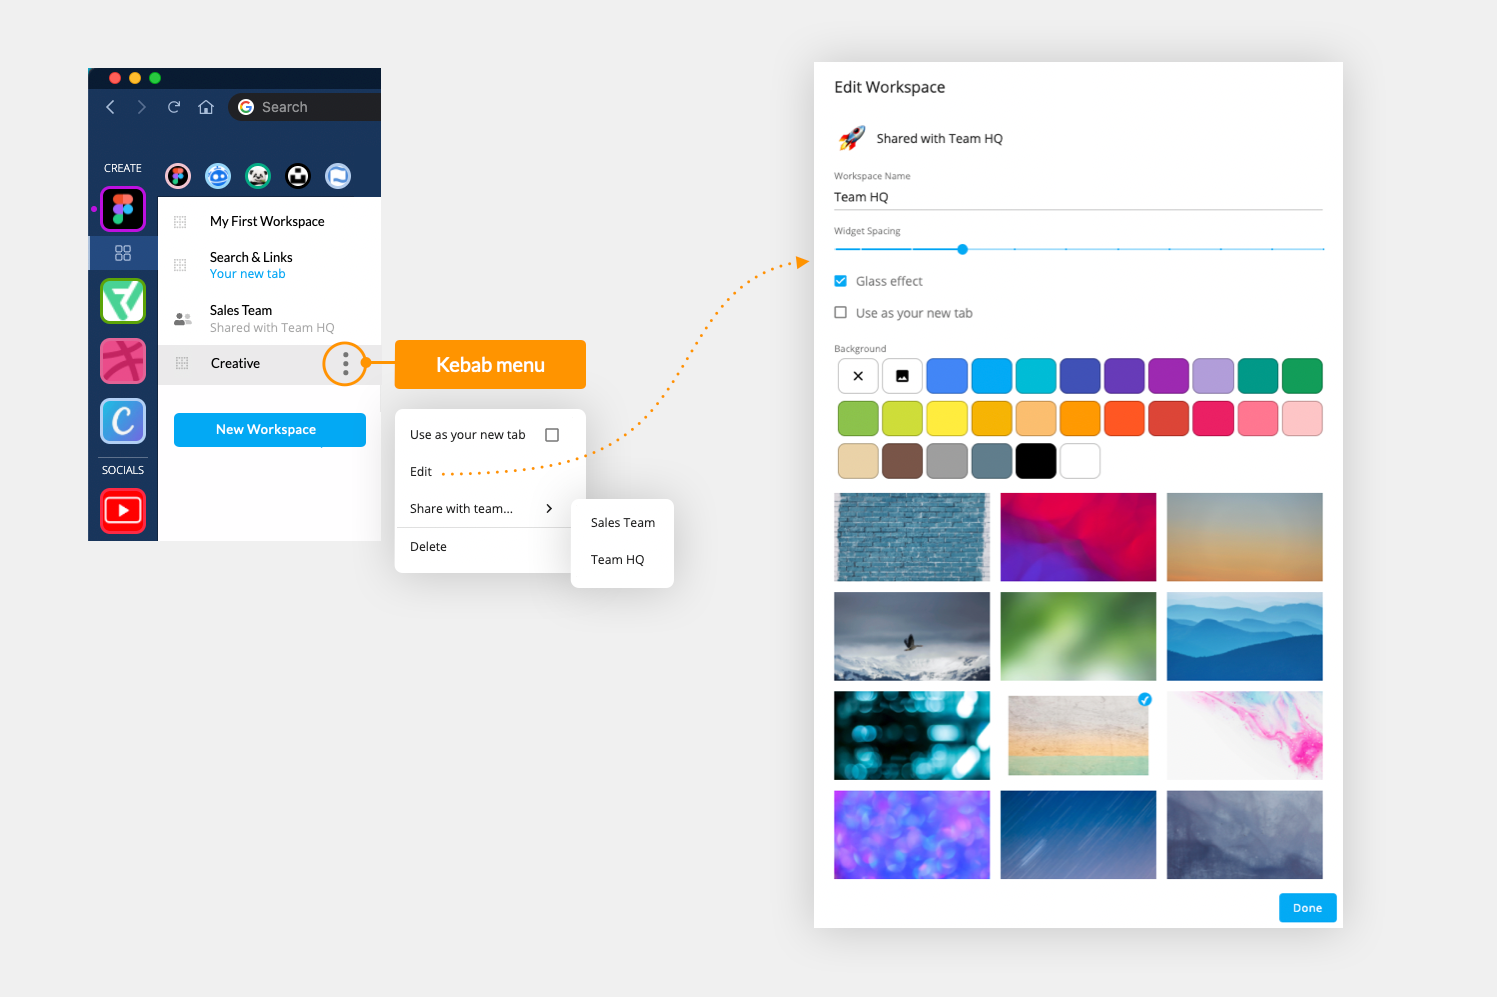
- Share a Workspace: Highlight any Workspace in the pop-out menu, and click on the kebab icon (three dots) followed by 'Share with Team.' Then select a Team name from the list. The Workspace will instantly appear in the Workspaces menu for all team members. Team members will also get a desktop notification for the shared Workspace, and an alert will appear in the Team Activity widget.
- Choose a Workspace for your new tab: Highlight any Workspace in the pop-out menu, and click on the kebab icon (three dots) followed by 'Use as your new tab.' The Workspace will appear in all new tabs.
- To pin a Workspace to a group: When creating a new Workspace, select the option to 'Pin to a Group', then choose a group from the list. Or right-click on any Group and select 'Pin Workspace.' A small Workspaces icon will appear under the group icon in the sidebar.
- To delete a workspace: Highlight any Workspace in the pop-out menu, then click on the kebab icon (three dots) and select 'Delete.' Confirm you want to delete the Workspace via the pop-up prompt.
Creating a New Workspace
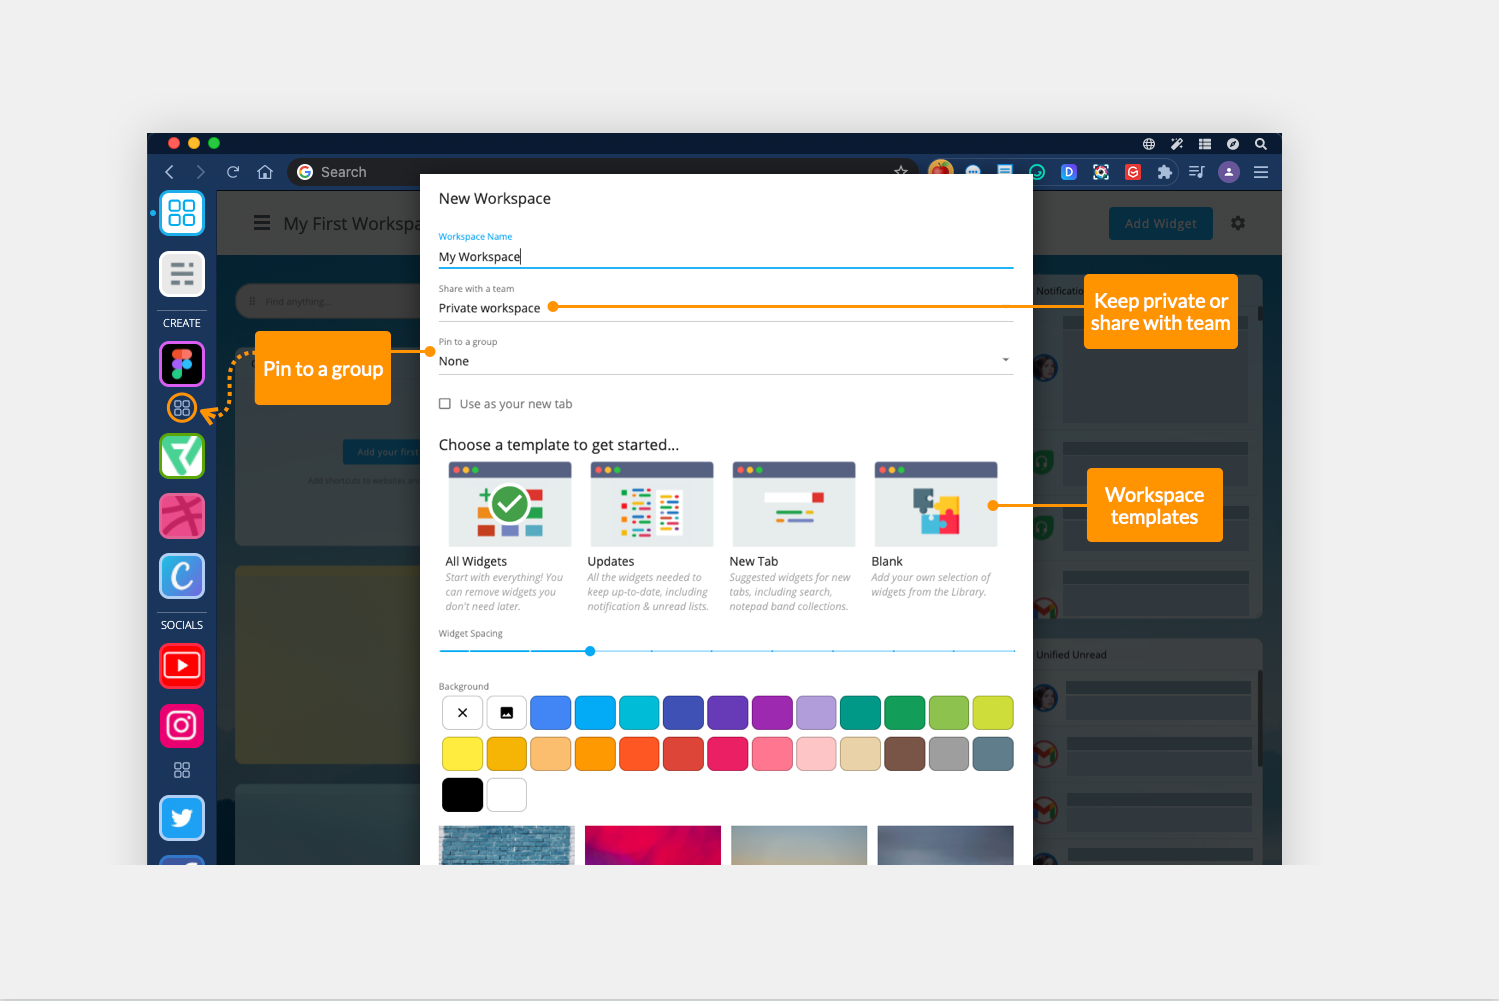
Click on the burger icon to pop-out the Workspaces menu, then select 'New Workspace' to open a new window. The following options can easily be changed at any time:
- Name: This name will appear in the Workspaces menu for you and your team (if shared).
- Private or Share: Choose to keep as private or click on the dropdown list to choose a team.
- Pin to a Group: Select a sidebar group from the dropdown list to add a link to the Workspace in the sidebar.
- Use as your new tab: Check the box if you want this to be your new tab Workspace.
- Choose a template: If you're new to Workspaces, try a template to discover new widgets. See the next section for more information about templates.
- Widget spacing: Toggle the slider to select spacing between widgets.
- Background: Select a solid color, upload a background image, or choose from our library of images (courtesy of Unsplash!). https://unsplash.com/wallpapers
Example Workspaces
Workspaces are used as launchpads for all your frequently used apps and links. They offer a way of bringing scattered web links together under a common theme, such as a project or department. Here are some examples:
- Group Quick Links: Create a Workspace for a group to pull out frequently used apps, websites, and documents.
- Projects: Create a Workspace for a particular project or department, such as a marketing campaign or sales & marketing team. 'Pin' apps and pages relating to that project in the workspace so that everyone can find it easily, such as a Trello board or Google Drive folder.
- Clients: Create a workspace for each client, with links to their apps.
- Onboarding: Use Workspaces to onboard new users with all the apps and links they need to get up and running quickly.
- Teams: Create a Workspace for your team, with Collections for projects, and team tasks, using the Team Feed widget to keep everyone up-to-date.
🚀 Try Wavebox - From medical researchers to virtual assistants, Wavebox is helping busy people worldwide rediscover the web and harness its potential to make life easier—just take a quick look at our Trustpilot reviews to see how delighted Waveboxers are with their new browser workflows. Download Wavebox on mac, Windows, and Linux to start your 7-day free trial.