? Step 1: Buy Seats
?
Seat Info
- You can buy more seats at any time.
- We offer a 30-day money-back guarantee on all team seats.
- Contact support for discounts on 5+ seats.
- You can buy more seats at any time.
- We offer a 30-day money-back guarantee on all team seats.
- Contact support for discounts on 5+ seats.
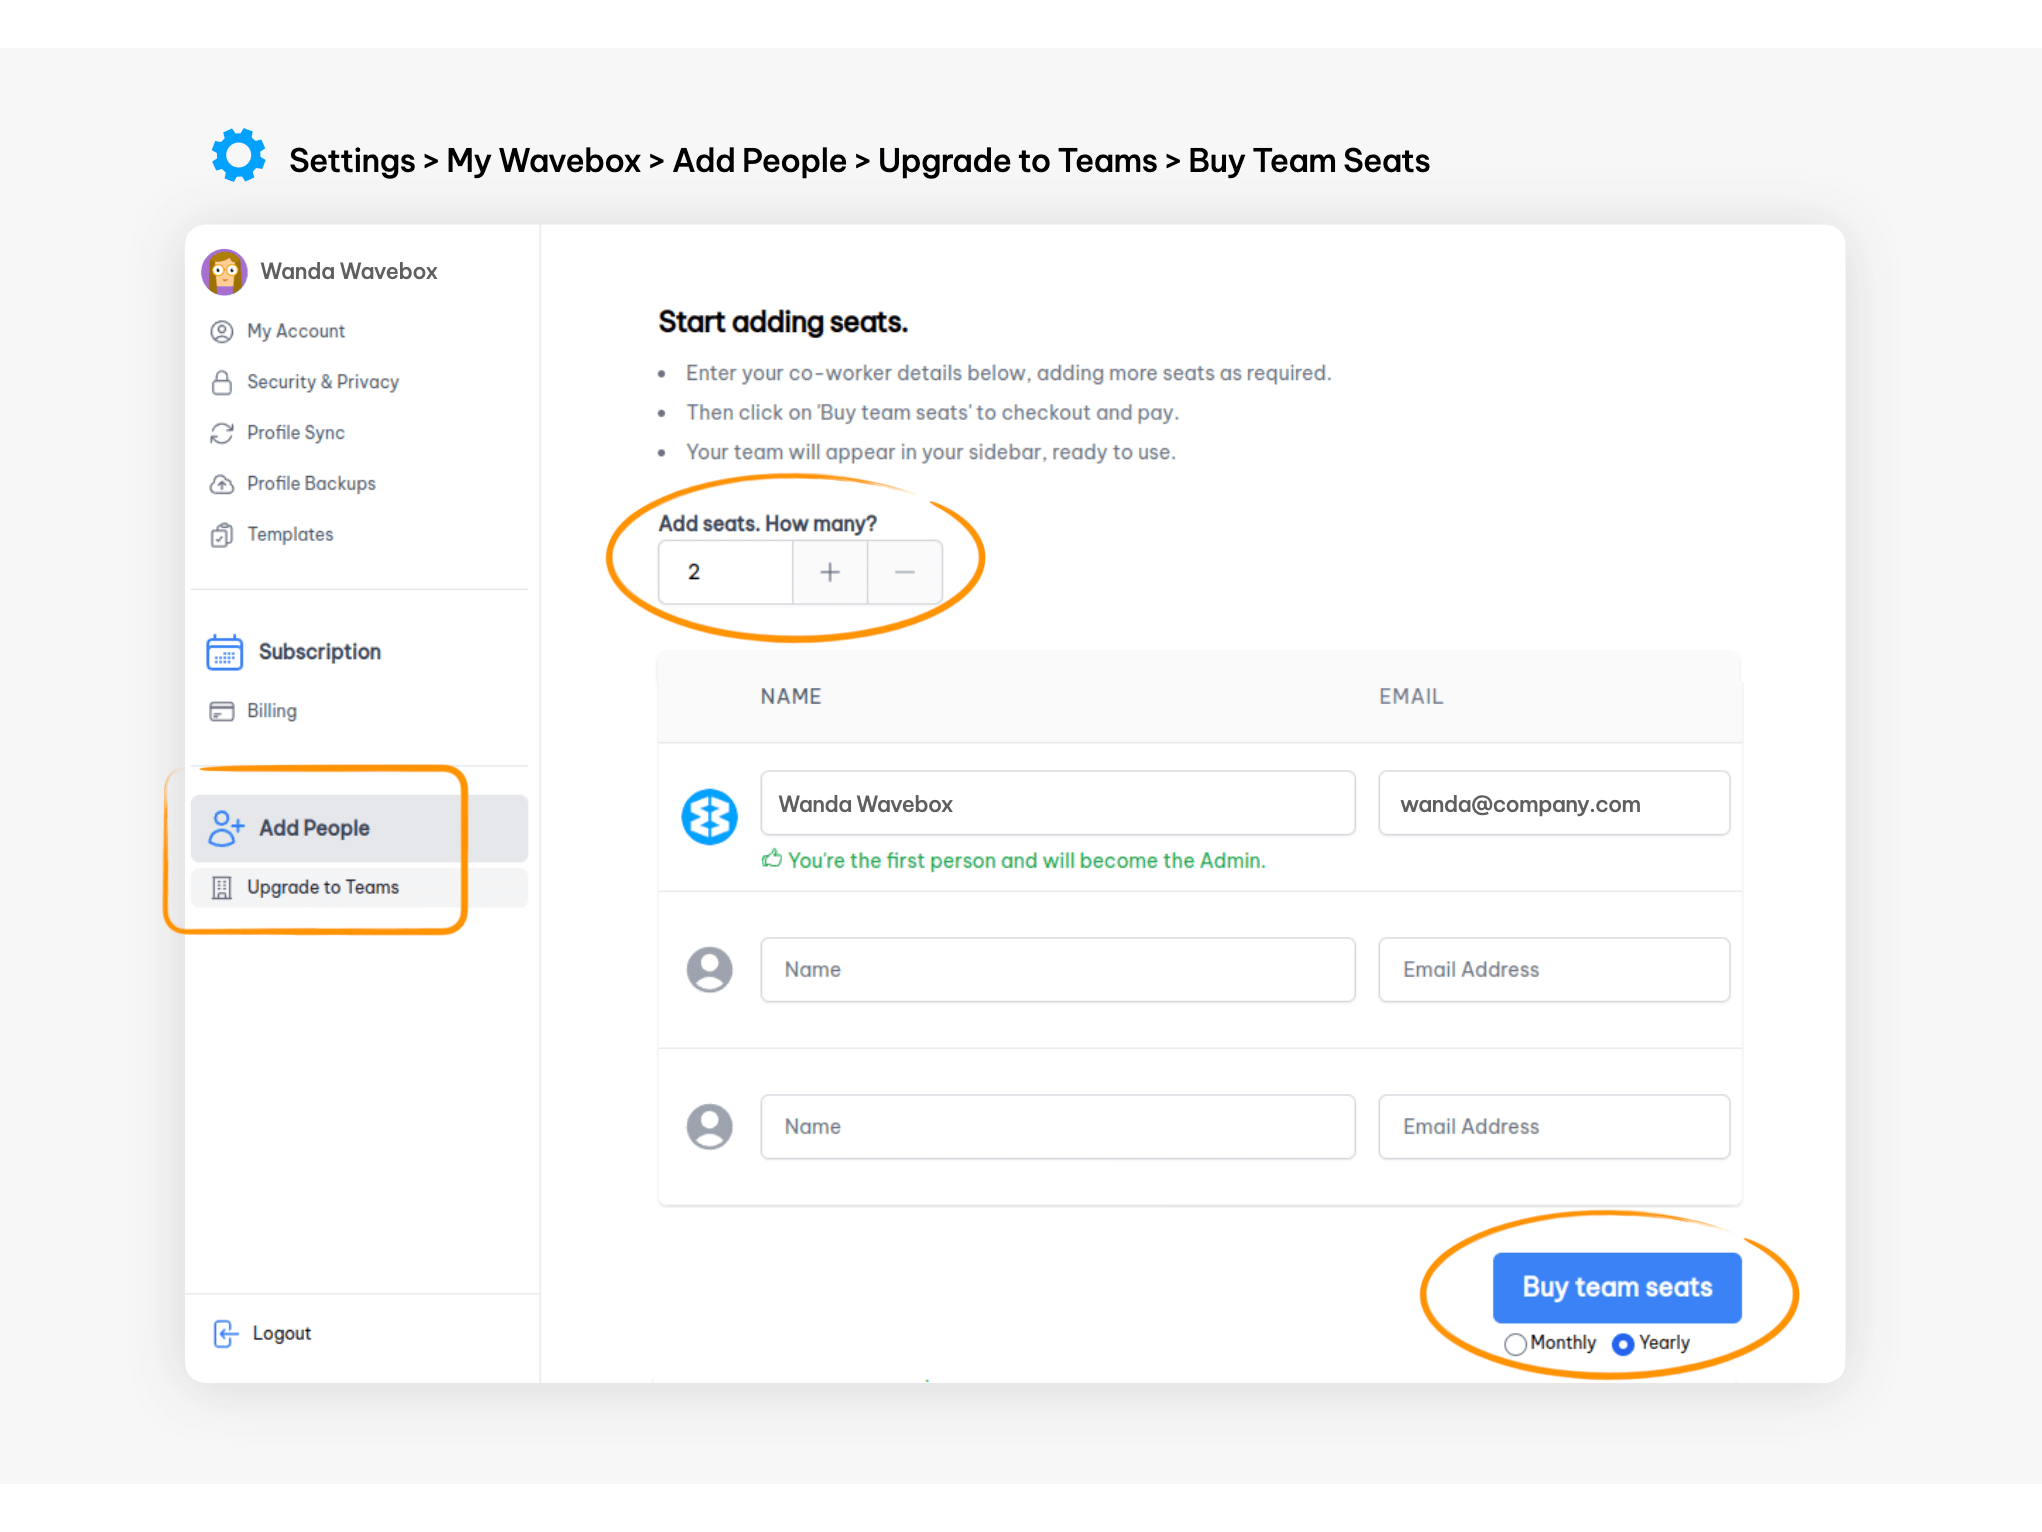
- Go to ⚙️ Settings (bottom left) > My Wavebox to open the Admin Portal.
- In the Admin Portal, click on Add People > Upgrade to Teams in the sidebar menu.
- Use + to enter the number of seats you need for your team
- Click on Buy Seats to go to the Stripe Billing Portal.
- After purchase, a team will appear in the sidebar, ready for you to allocate seats.