? Step 1: Buy Seats
?
Seat Info
- You can buy more seats at any time.
- We offer a 30-day money-back guarantee on all team seats.
- Contact support for discounts on 5+ seats.
- You can buy more seats at any time.
- We offer a 30-day money-back guarantee on all team seats.
- Contact support for discounts on 5+ seats.

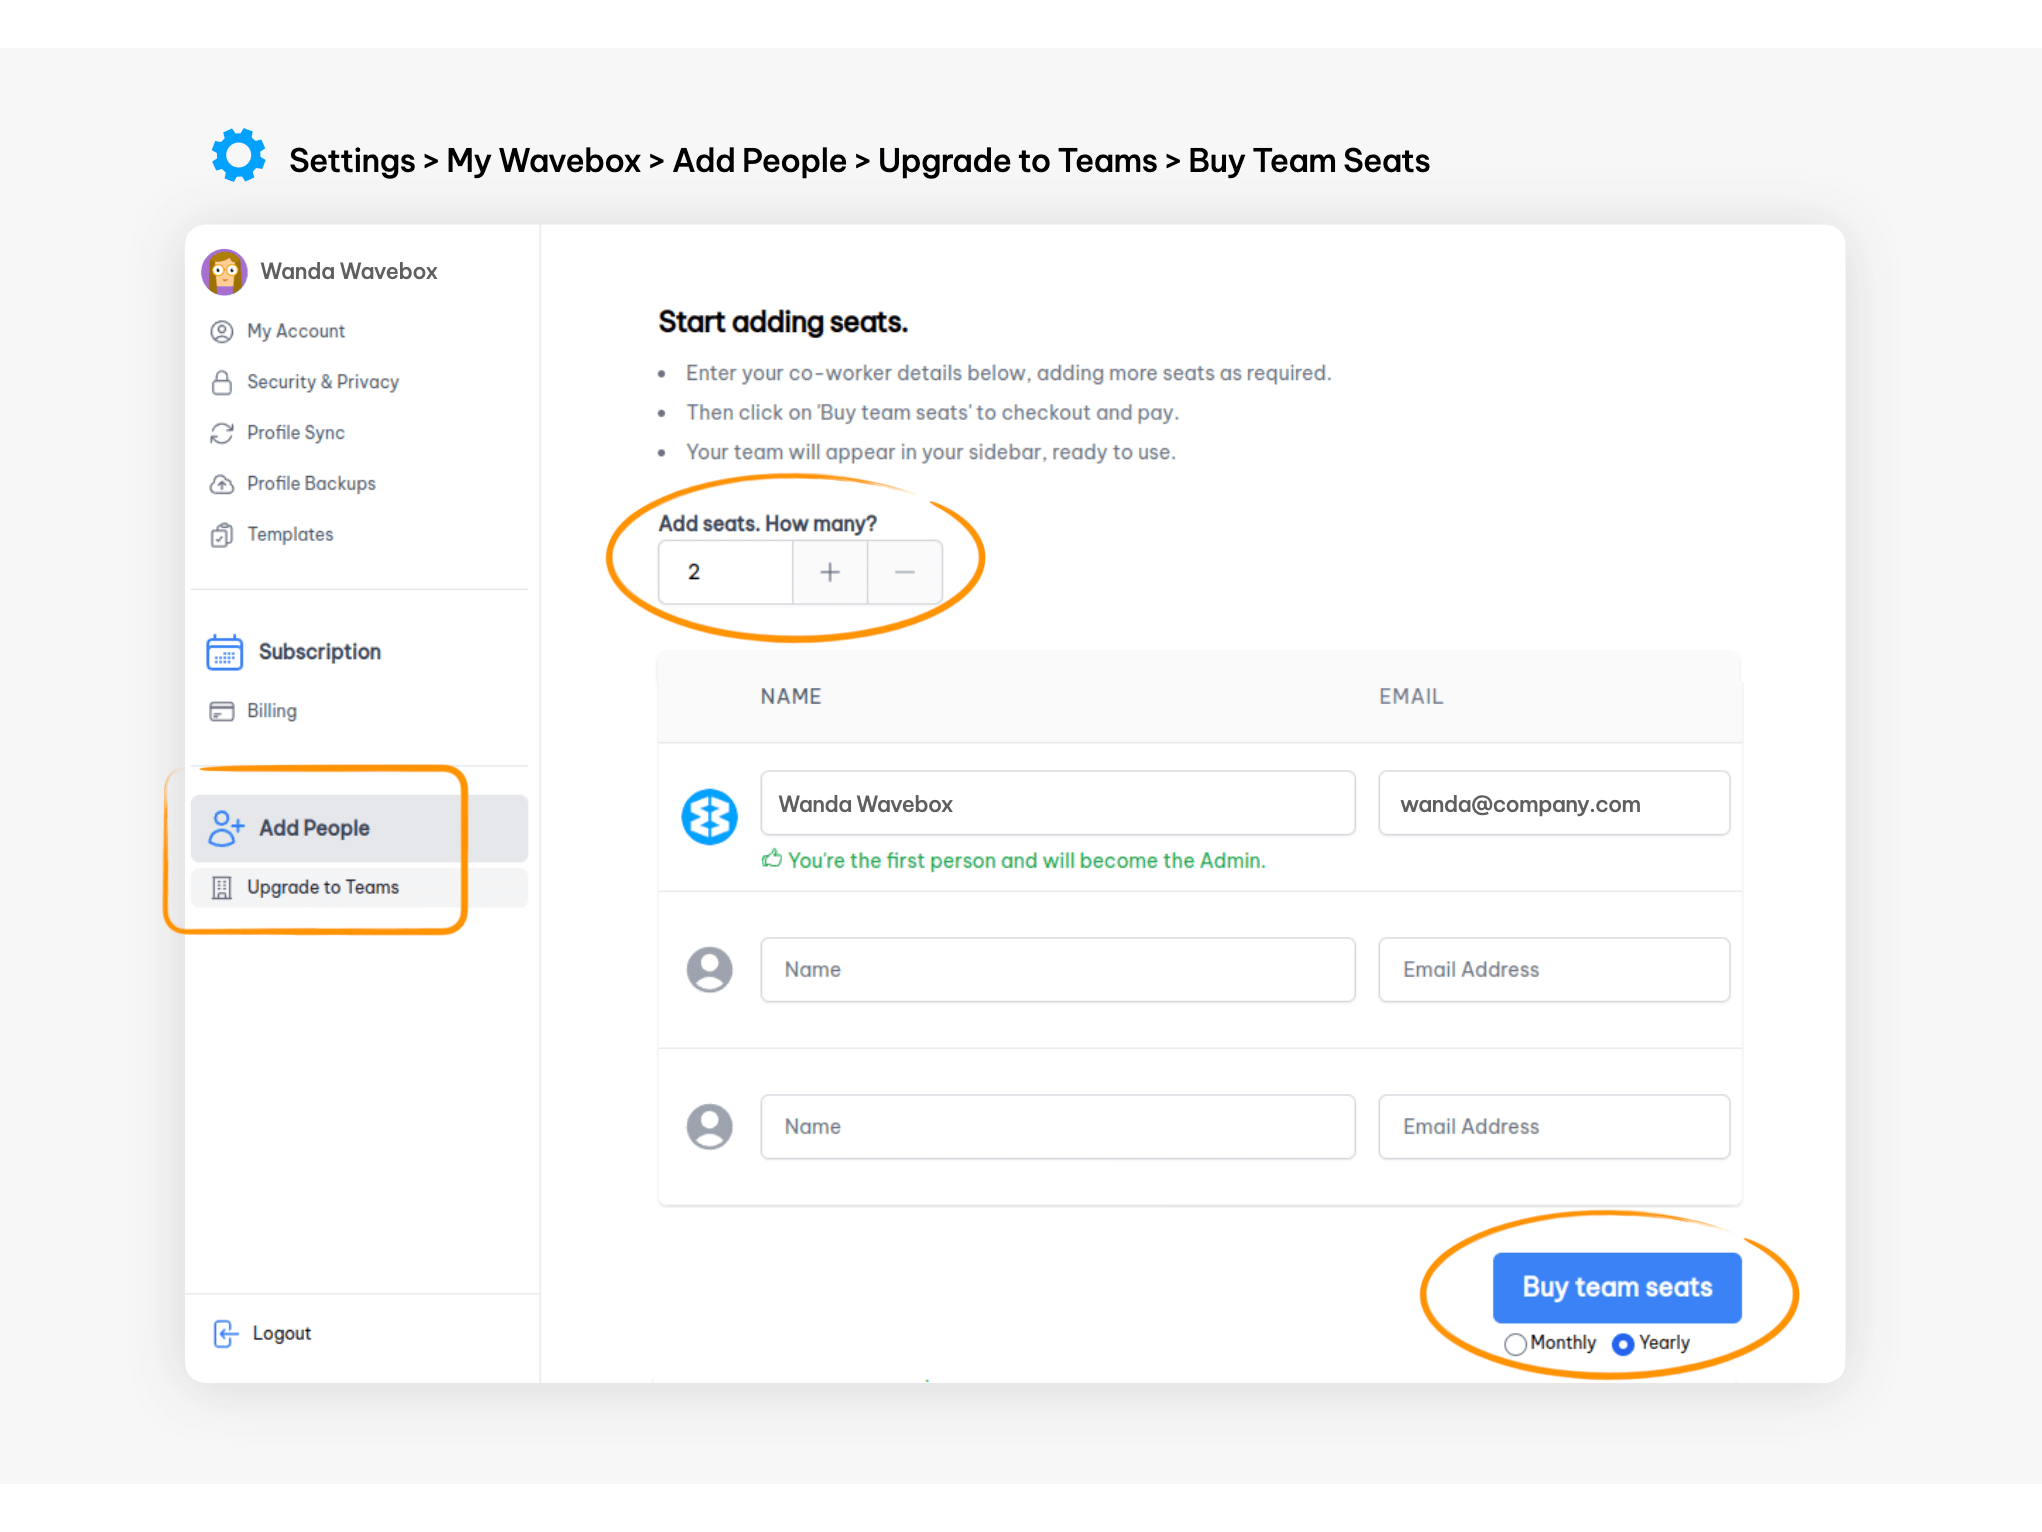
- Go to ⚙️ Settings (bottom left) > My Wavebox to open the Admin Portal.
- In the Admin Portal, click on Add People > Upgrade to Teams in the sidebar menu.
- Use + to enter the number of seats you need for your team
- Click on Buy Seats to go to the Stripe Billing Portal.
? Step 2: Create an Install Template (optional)
?
Template Info
Create a template for your team so they have apps and resources already set up when they install Wavebox. How to create and share a template.
Create a template for your team so they have apps and resources already set up when they install Wavebox. How to create and share a template.

- Click on the Profile icon top-right, followed by the Share icon, to create a new template. Find out how to create a template here.
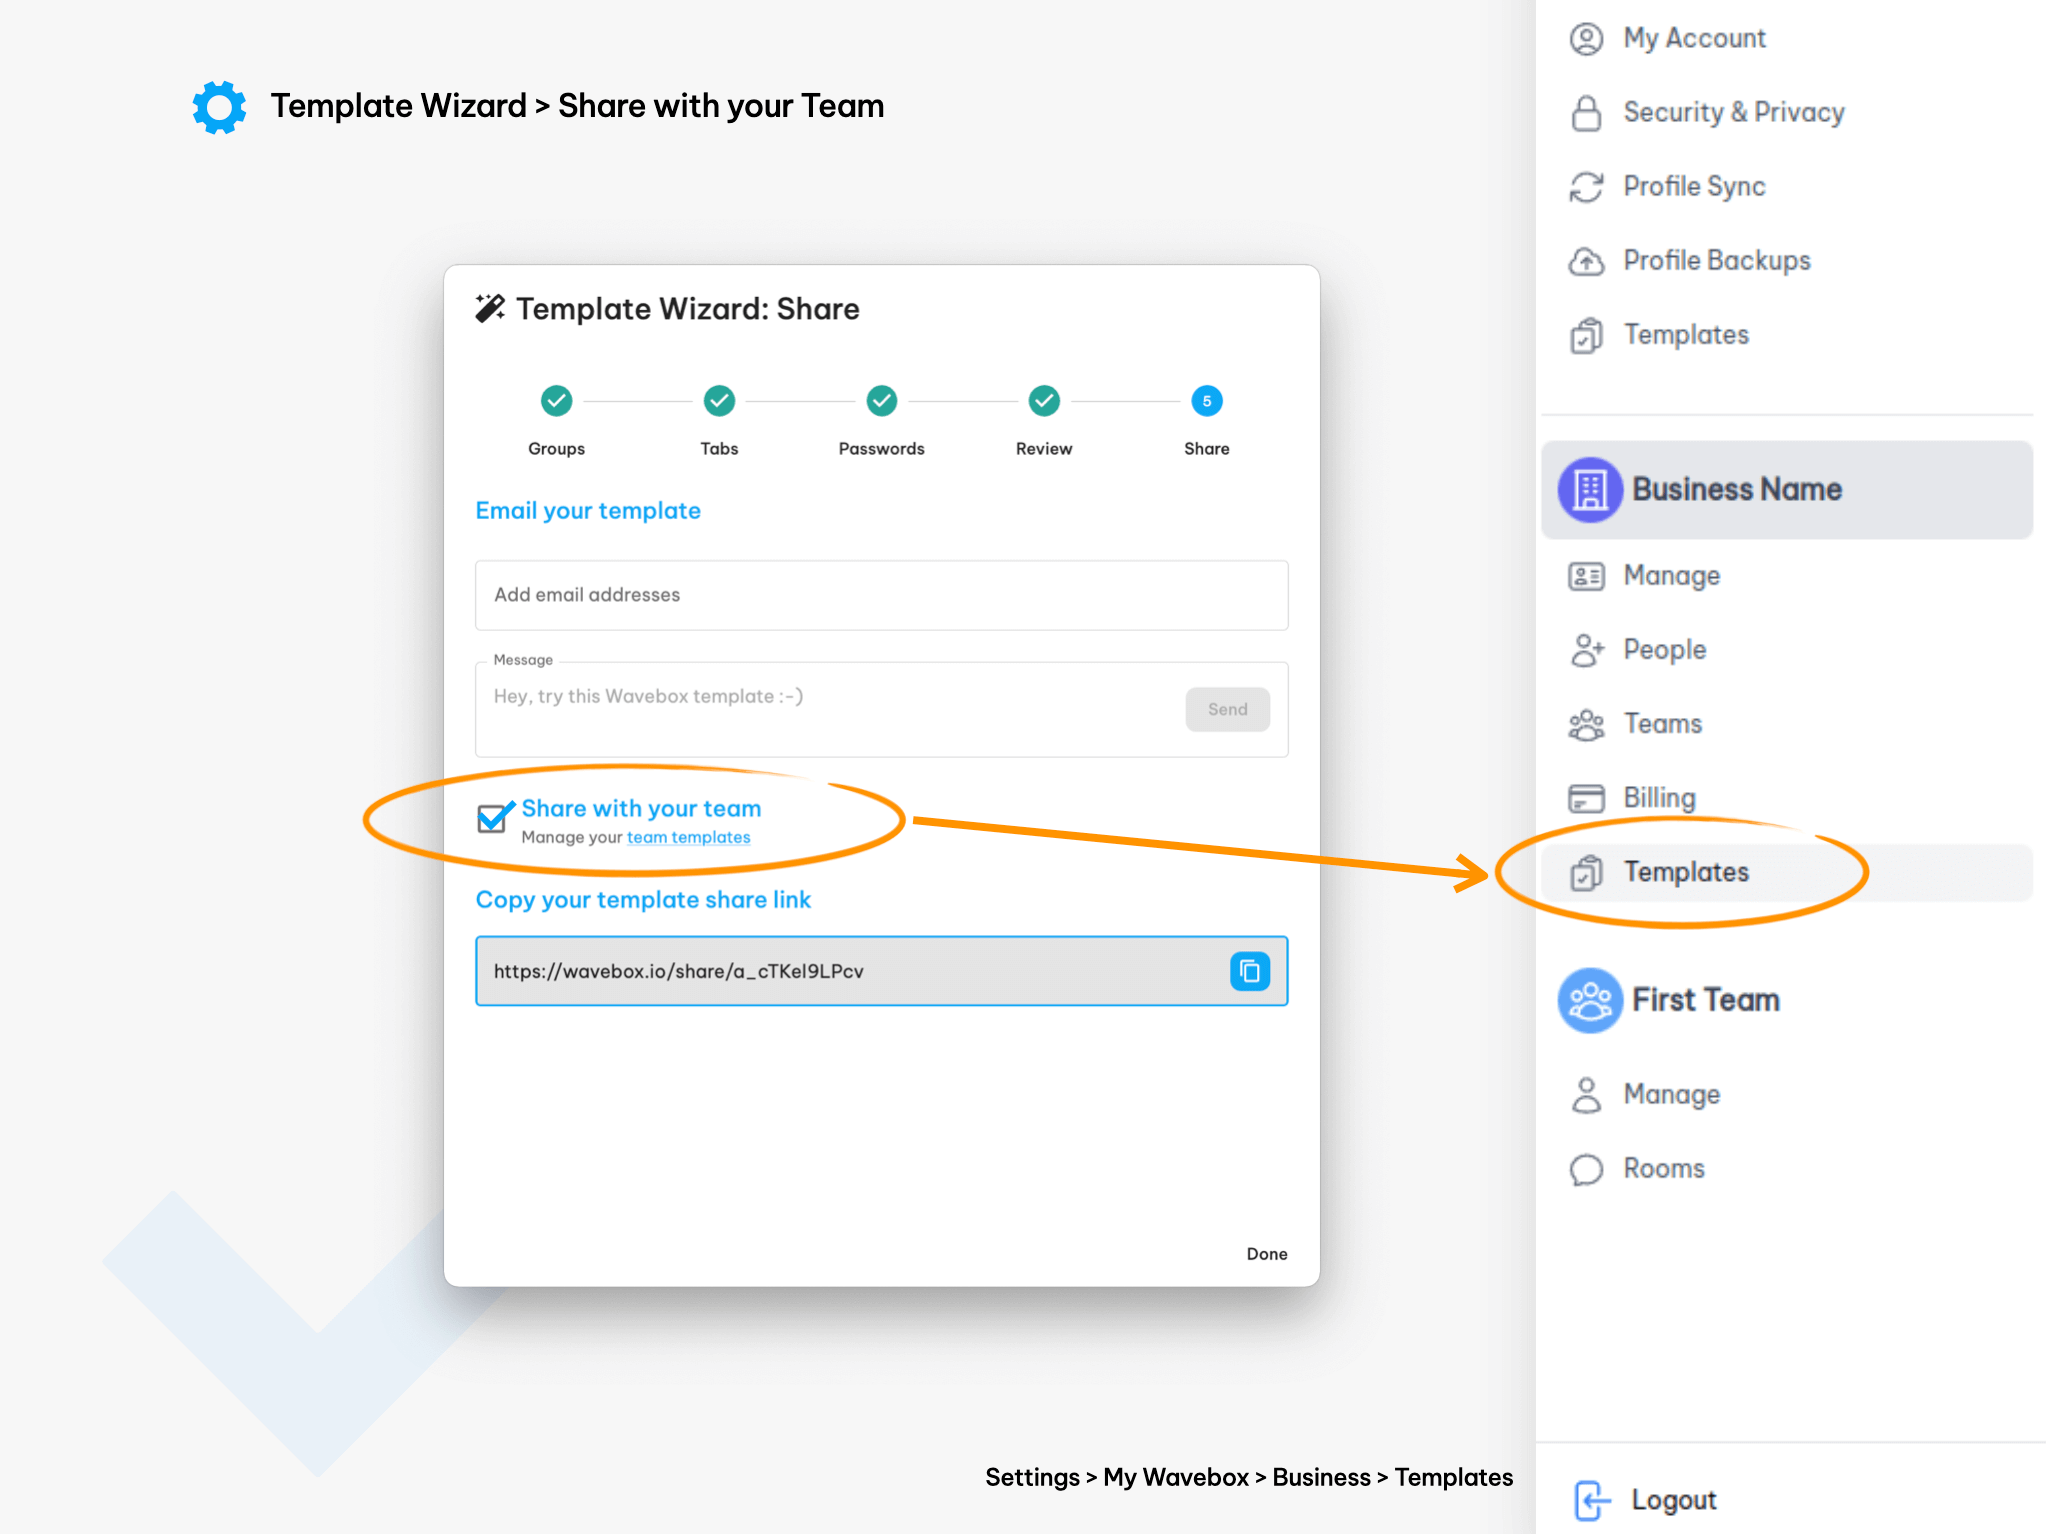
- Follow the wizard instructions, and at the final step, Share the template with your team.
- You can also go to My Wavebox > Templates and share the template by finding it in the list and checking the Teams box.
?? Step 3: Add and Invite People
?
People Info
- You are the admin of any team you create.
- You can create as many teams as you like.
- Users can belong to more than one team.
- Users can edit their own name & photo.
- You are the admin of any team you create.
- You can create as many teams as you like.
- Users can belong to more than one team.
- Users can edit their own name & photo.

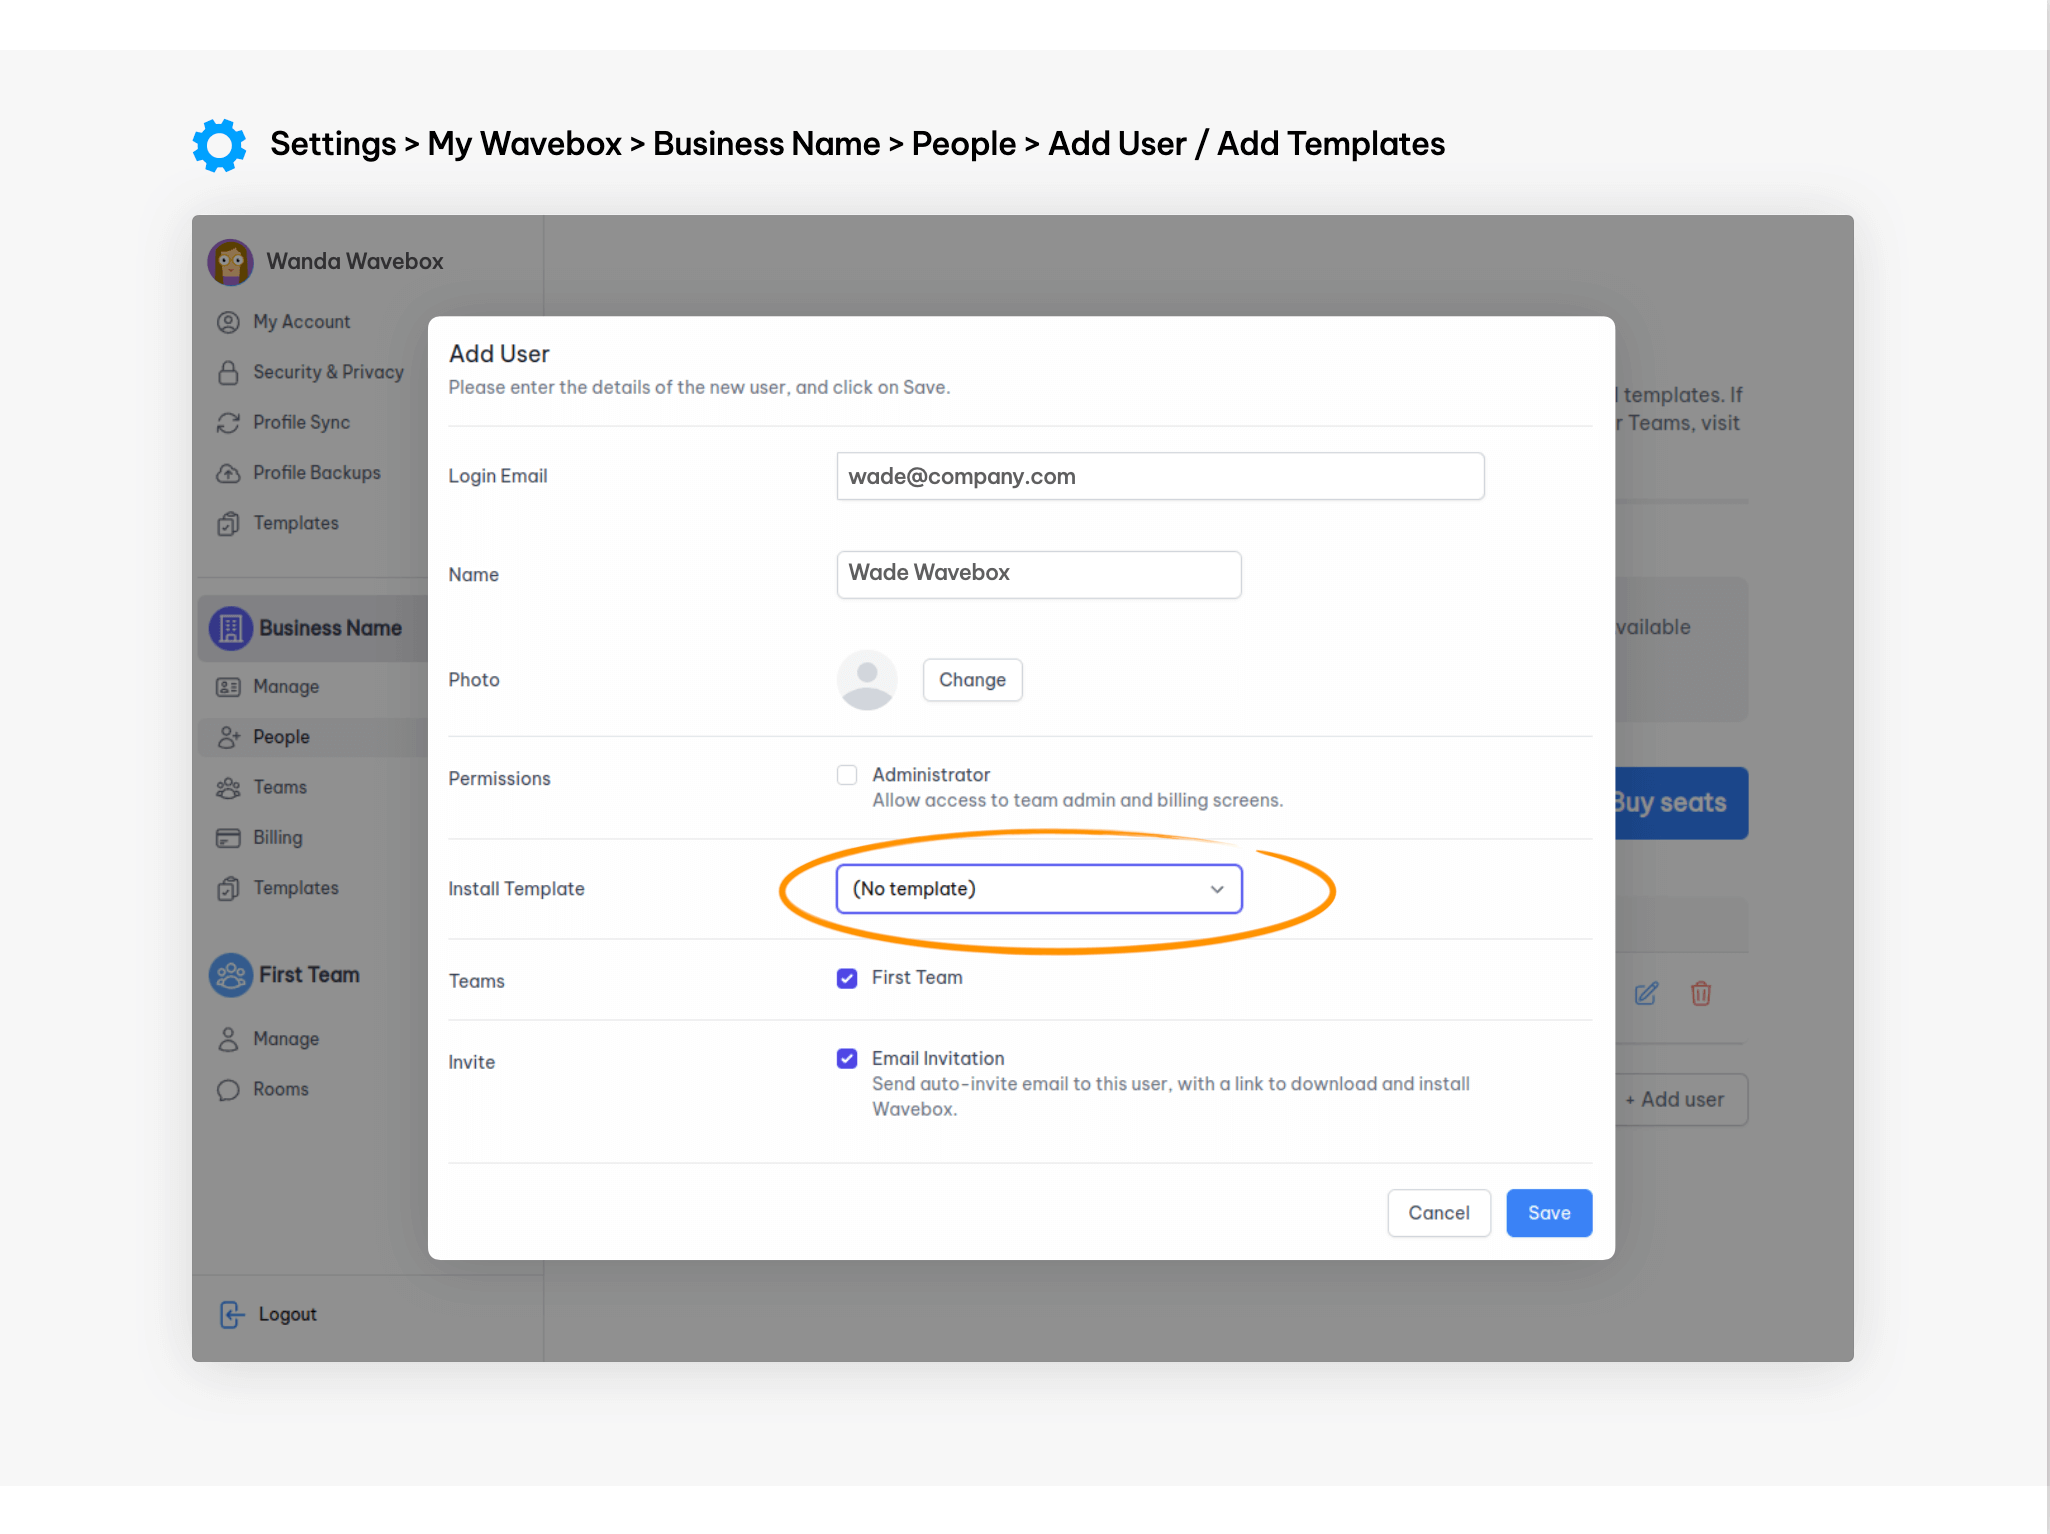
- Click on People in the sidebar menu.
- Click on Add User and fill in their details.
- Choose an Install Template from the dropdown list (optional).
- Check the Team box.
- Check the Email Invitation box to send an email invite to the user as soon as you click on Save, or leave the box unchecked to send an invite later.
? Step 4: Connect: Chat, Calls, and Screenshare
?
Connect
Connect is our remote working extension. It offers fully encrypted chat, video/audio calls, and screensharing. Use Connect to send a quick DM, for ad-hoc meetings, and to check-in with co-workers. How to use Connect.
Connect is our remote working extension. It offers fully encrypted chat, video/audio calls, and screensharing. Use Connect to send a quick DM, for ad-hoc meetings, and to check-in with co-workers. How to use Connect.

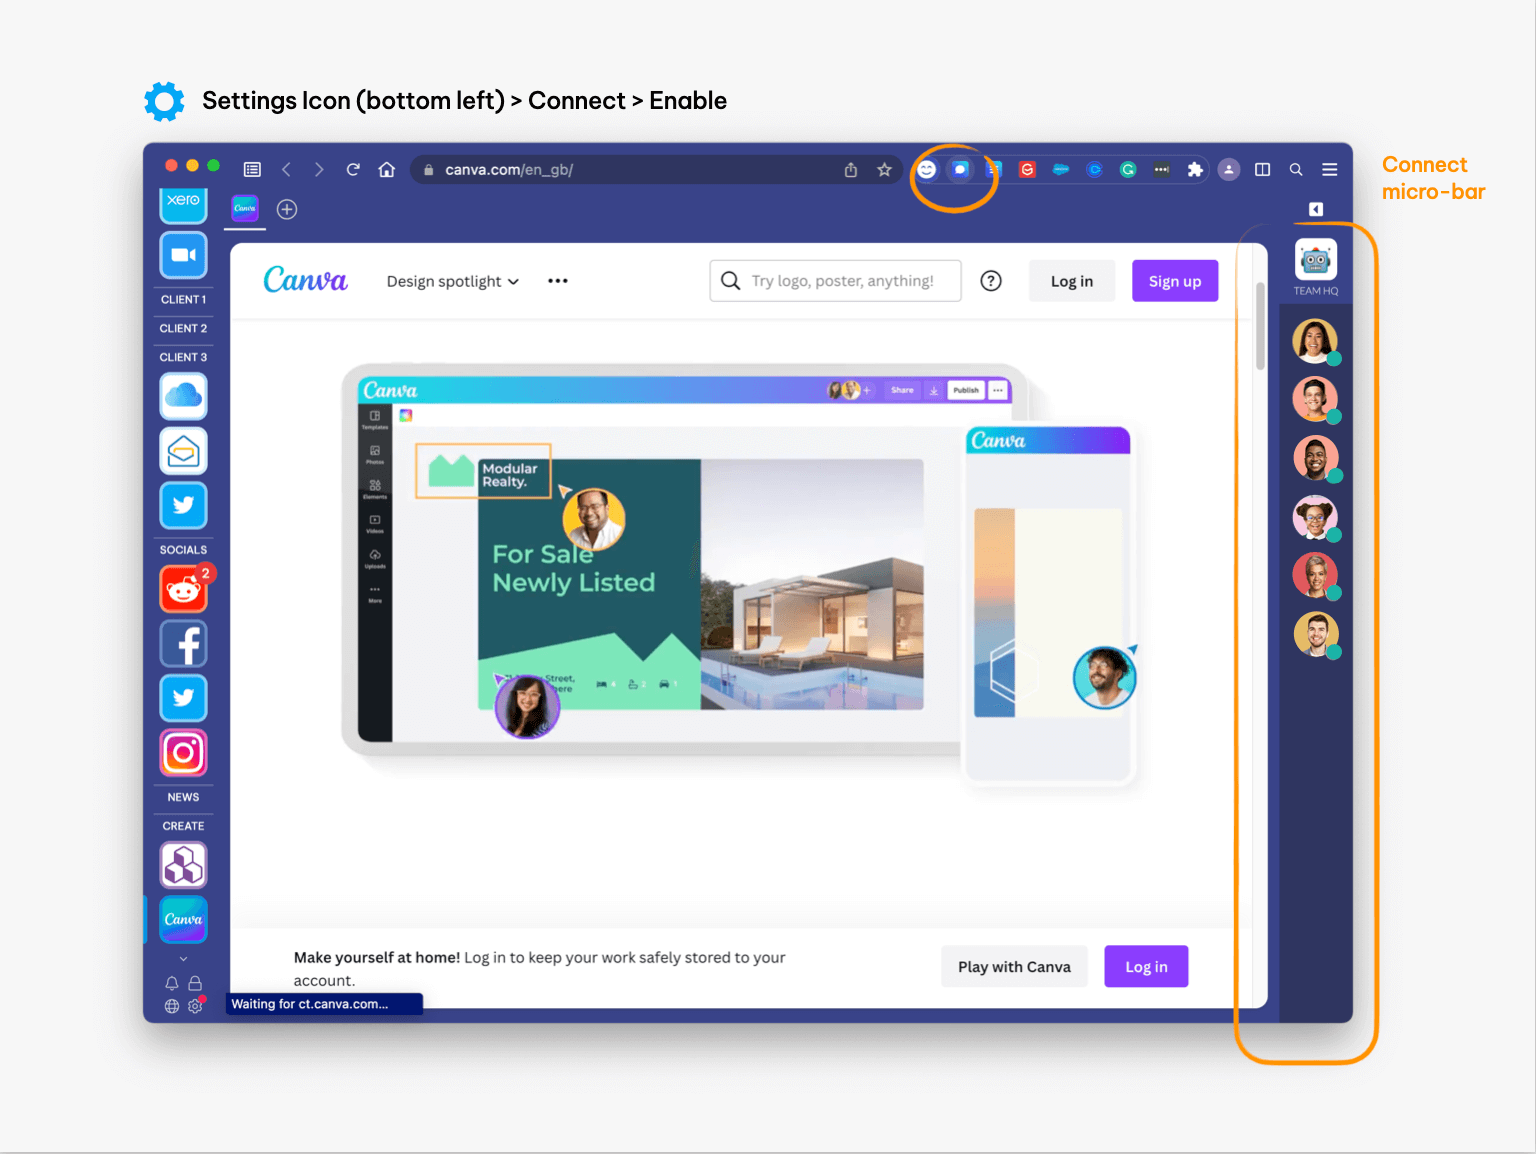
- When you create your First Team, the Connect icon (white speech bubble) will appear in the address bar next to your extension icons.
- Click the Connect icon once to reveal the Connect microbar in the main Wavebox window (on the right). Click twice to show the full sidebar and again to hide it.
- Go to Settings > Connect to disable/enable Connect and manage your preferences.
Need help with Onboarding?
We're busy working on new tutorials and videos to make onboarding easier. In the meantime, we're here to help, so please contact support if you need assistance with any of the following: