⚡️ Now in Testing! Please contact support@wavebox.io to join the Beta. This KB article is currently being updated daily.
- How to Create a Live Profile for Your Team
- How to Onboard Users to a Live Profile.
- How to Update & Publish a Live Profile to your Team.
Build a Branded and Customized Browser for Your Business.
To use Live Profiles, you need to have purchased Team seats. In Wavebox, go to Settings > My Wavebox > People > Buy Seats for pricing.
For a full FAQ document on Live Profiles, please contact support@wavebox.io. New Teams please contact sales@wavebox.io for a discount on teams of 5+ seats.
Setting Up the Live Profile
1. Create a Team
- If you are new to Wavebox, we suggest creating a new team for your Live Profile. When you buy a team subscription, a team is auto-generated for you, and you can use that one. Or, you can create a new team altogether.
- Follow the steps in the following guide to create a new team and add users. https://wavebox.io/kb/how-do-i-invite-people-to-my-team/
- Creating a team for the Live Profile will also enable Dashboards and Connect.
2. Create a New Live Profile
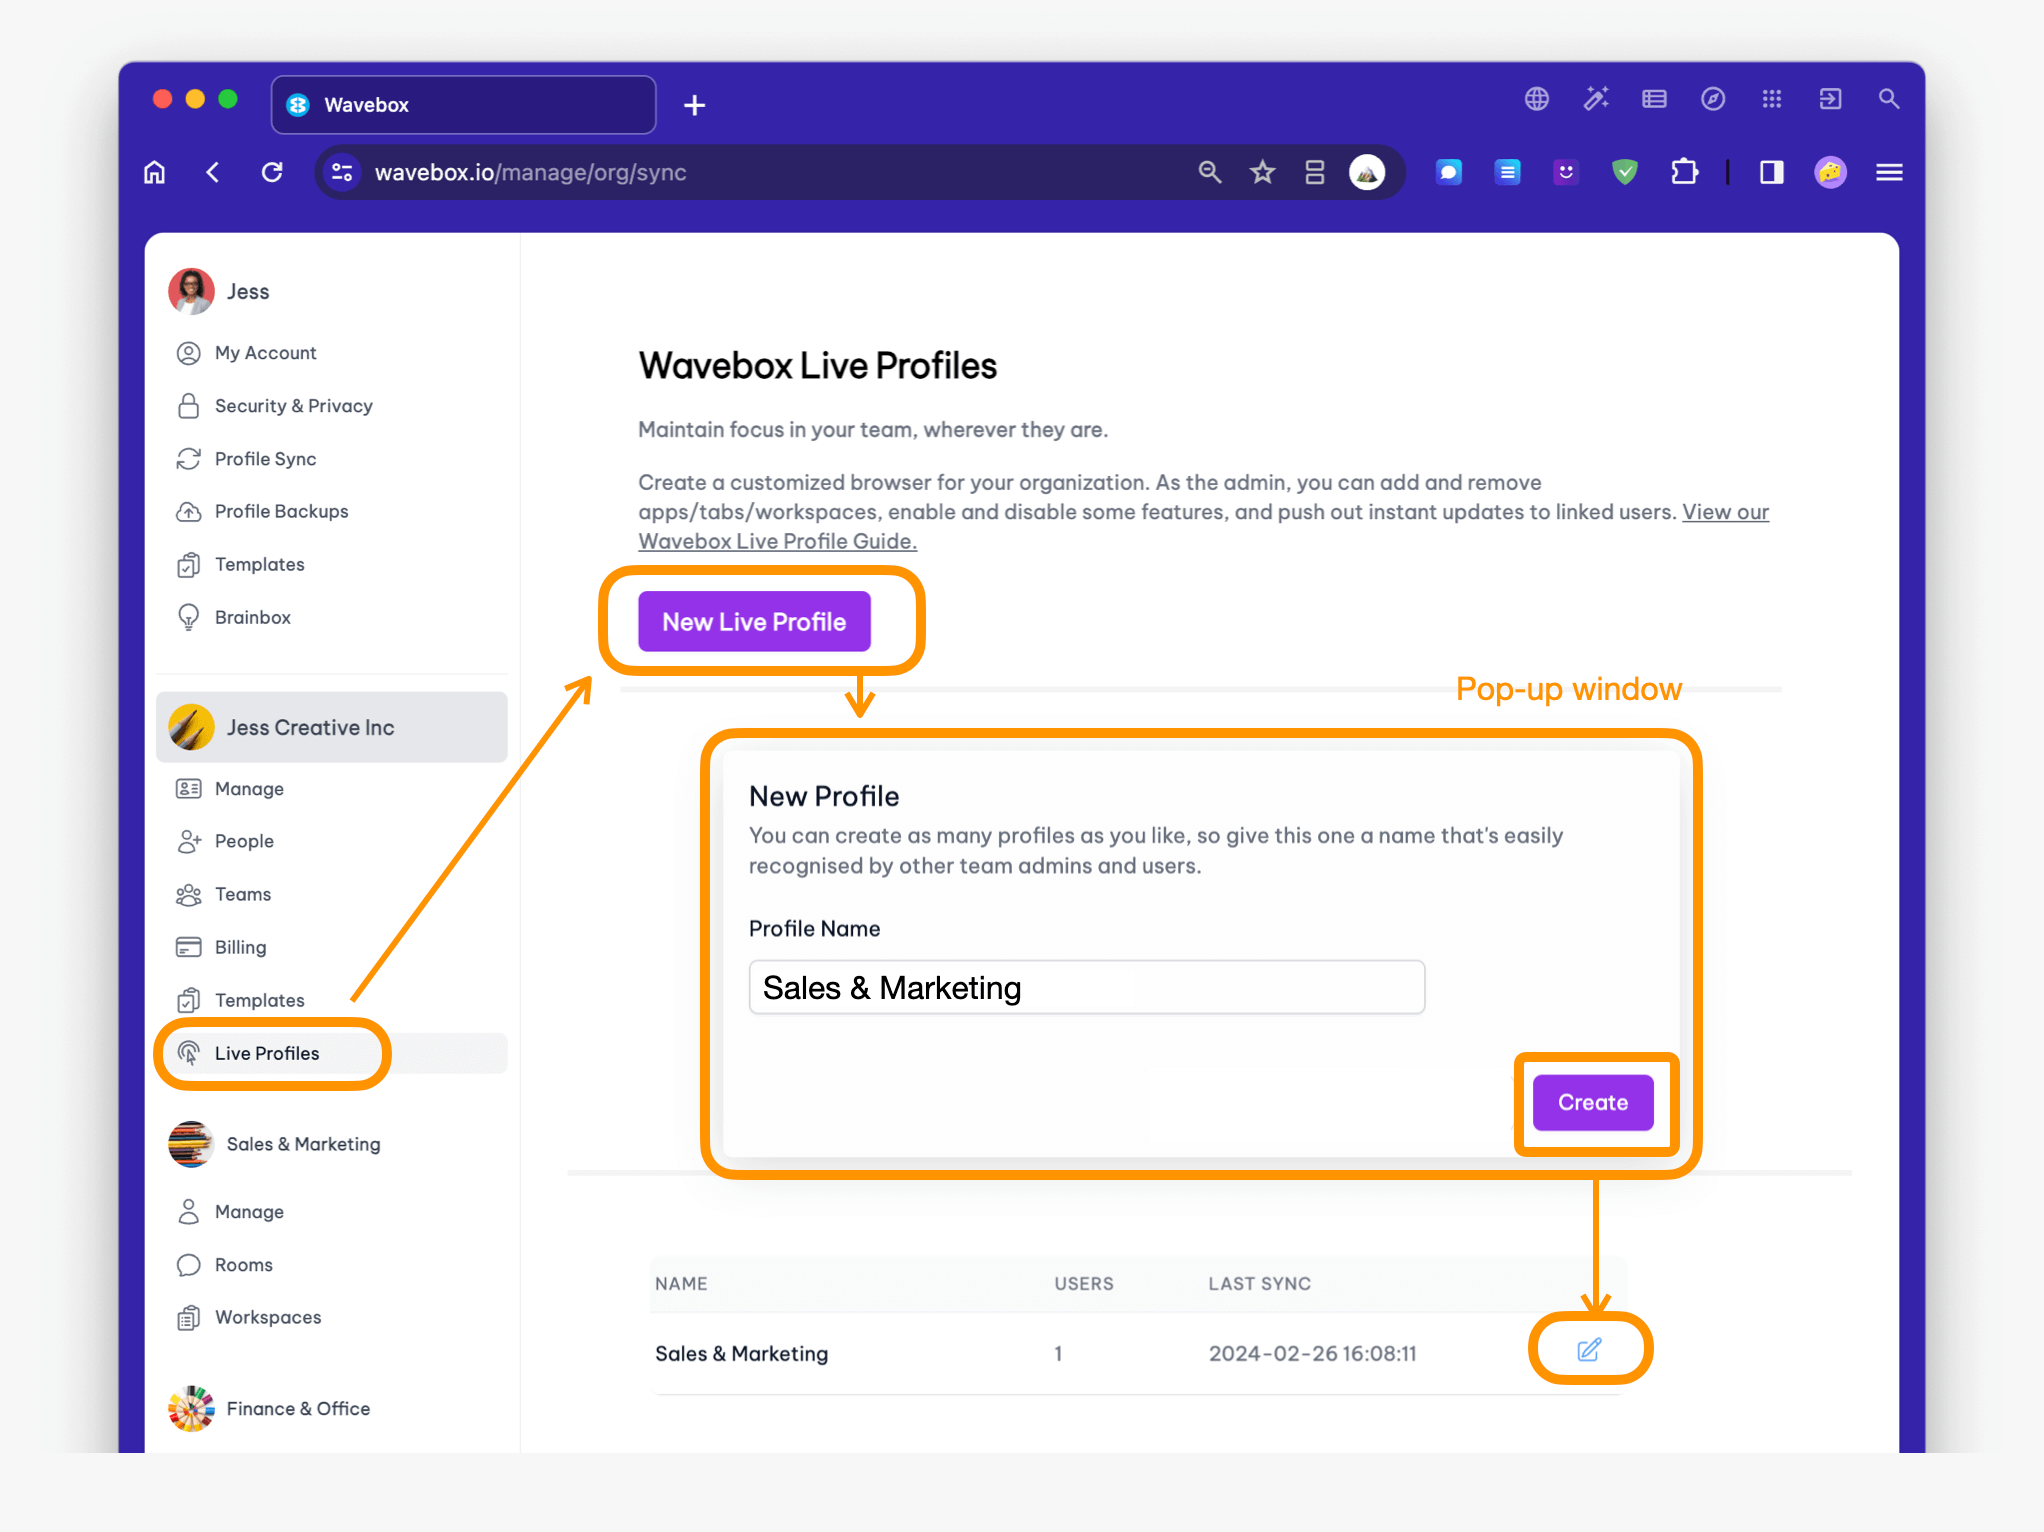
- In the Business section of the sidebar menu, click on Live Profiles to open the Live Profiles page.
- Click on the New Live Profile button.
- In the pop-up box, name your Profile, e.g., Sales & Marketing, and click on Create.
- A new listing will appear at the bottom of the Live Profiles page.
- Click on Edit to open the Profile Editing page.
3. Launch and Edit the Profile
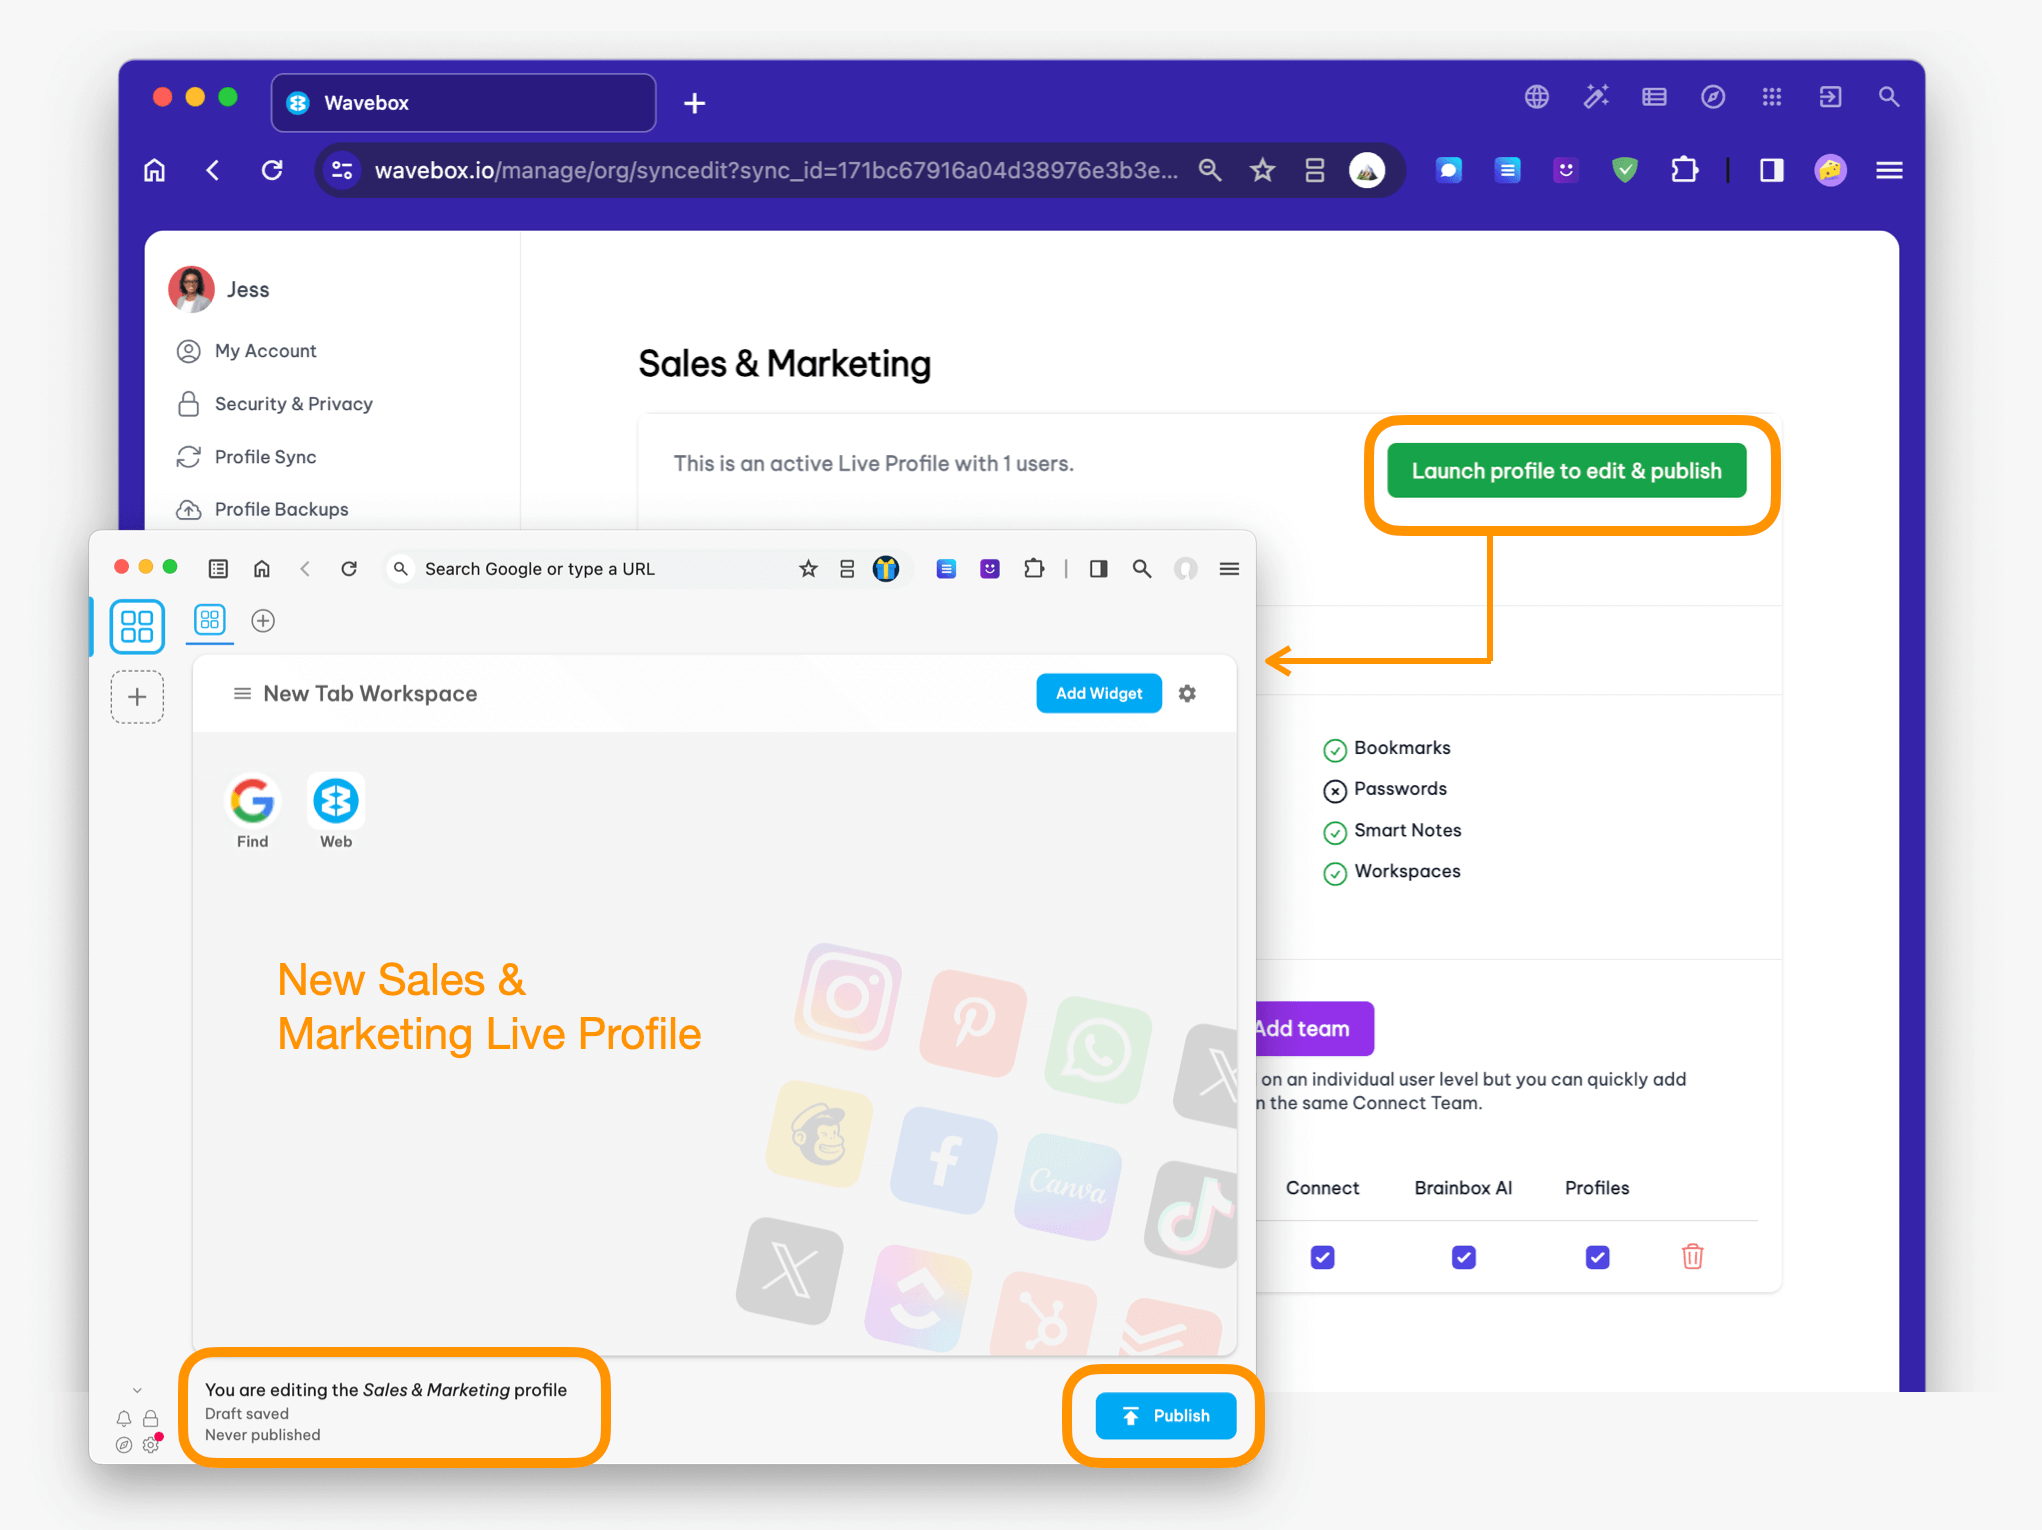
- On the Profile Editing page, click on Launch Profile to Edit & Publish button.
- A blank profile will open in a new window, ready for you to start editing.
- Changes are auto-saved, so you can close the draft profile and return to it anytime. Click Publish when you are ready to share it with users.
4. Building the Profile
(1) Using a Template
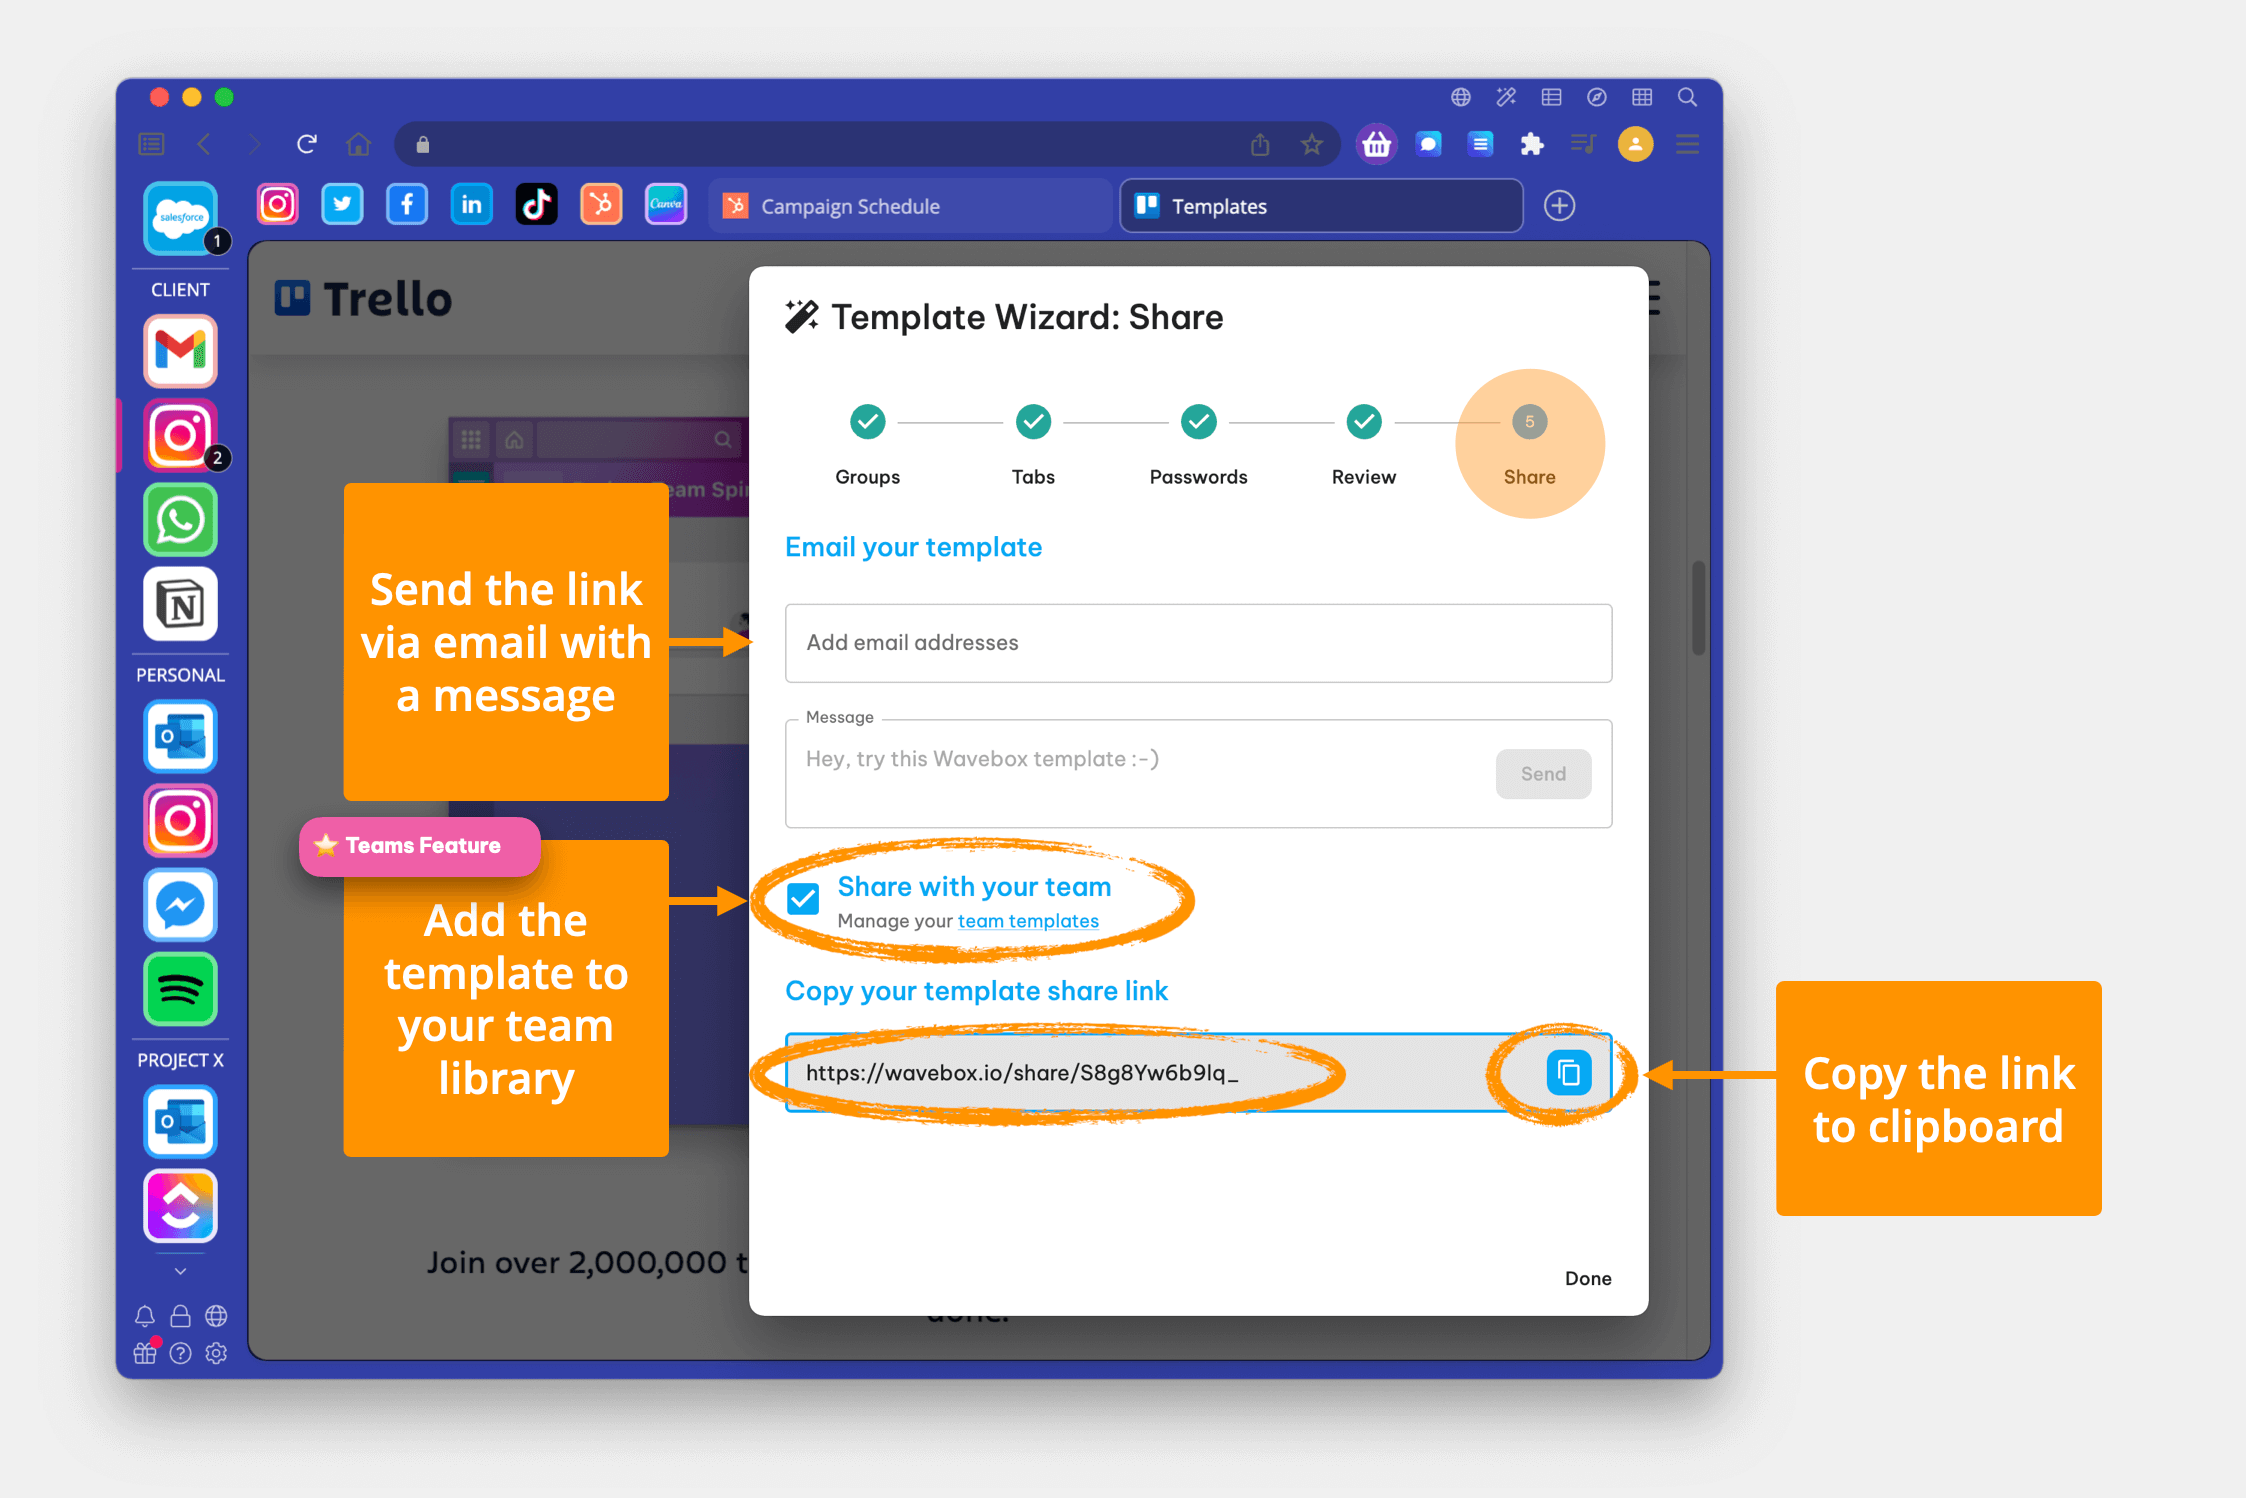
- Follow this KB post on creating a template from your own Wavebox profile.
- If you included passwords in your template, make a note of the Master Password somewhere.
- Important: If you're including apps like Gmail in your template, do not share the password if it is your own password. Purposely leave-out the password so the user needs to enter their own. (Doesn't apply to your clients' Gmail passwords).
- On the final step of the Template Wizard (shown above) click on the Share with your Team box to add the template to your team library.
- Next, go to My Wavebox > Team > Templates and copy the template share link (shown below).
- If you forgot to check the 'share with your team' box, don't worry; it will still be listed in the Templates section of your own account (at the top of the admin sidebar).

- Navigate to the new blank profile, paste the share link into the address bar, and hit return. Then follow the Template Wizard, entering the master password, if necessary. Complete the installation by clicking on the Add to Wavebox button.
(2) Starting from Scratch

- Add your spaces, groups, apps, and tabs, etc.
- Open Settings to make changes to badges, sleep etc. Refer to this KB article that suggests other settings you may want to change in your Live Profile.
- Change the theme, add your company logo (we suggest replacing the dashboard icon with your own logo), and upload a business-branded background to dashboards.
- Click on the jigsaw icon and select Add Extension to launch the Chrome Web Store. Search the store for the extension you need, then click the blue Add to Wavebox button.
- You can keep or remove the dashboard. They are handy spaces to communicate with users and share notes and ideas using widgets - more details below.
5. Populating Passwords
- If you are not using a password Chrome extension such as LastPass, there are 3 ways to add your passwords:
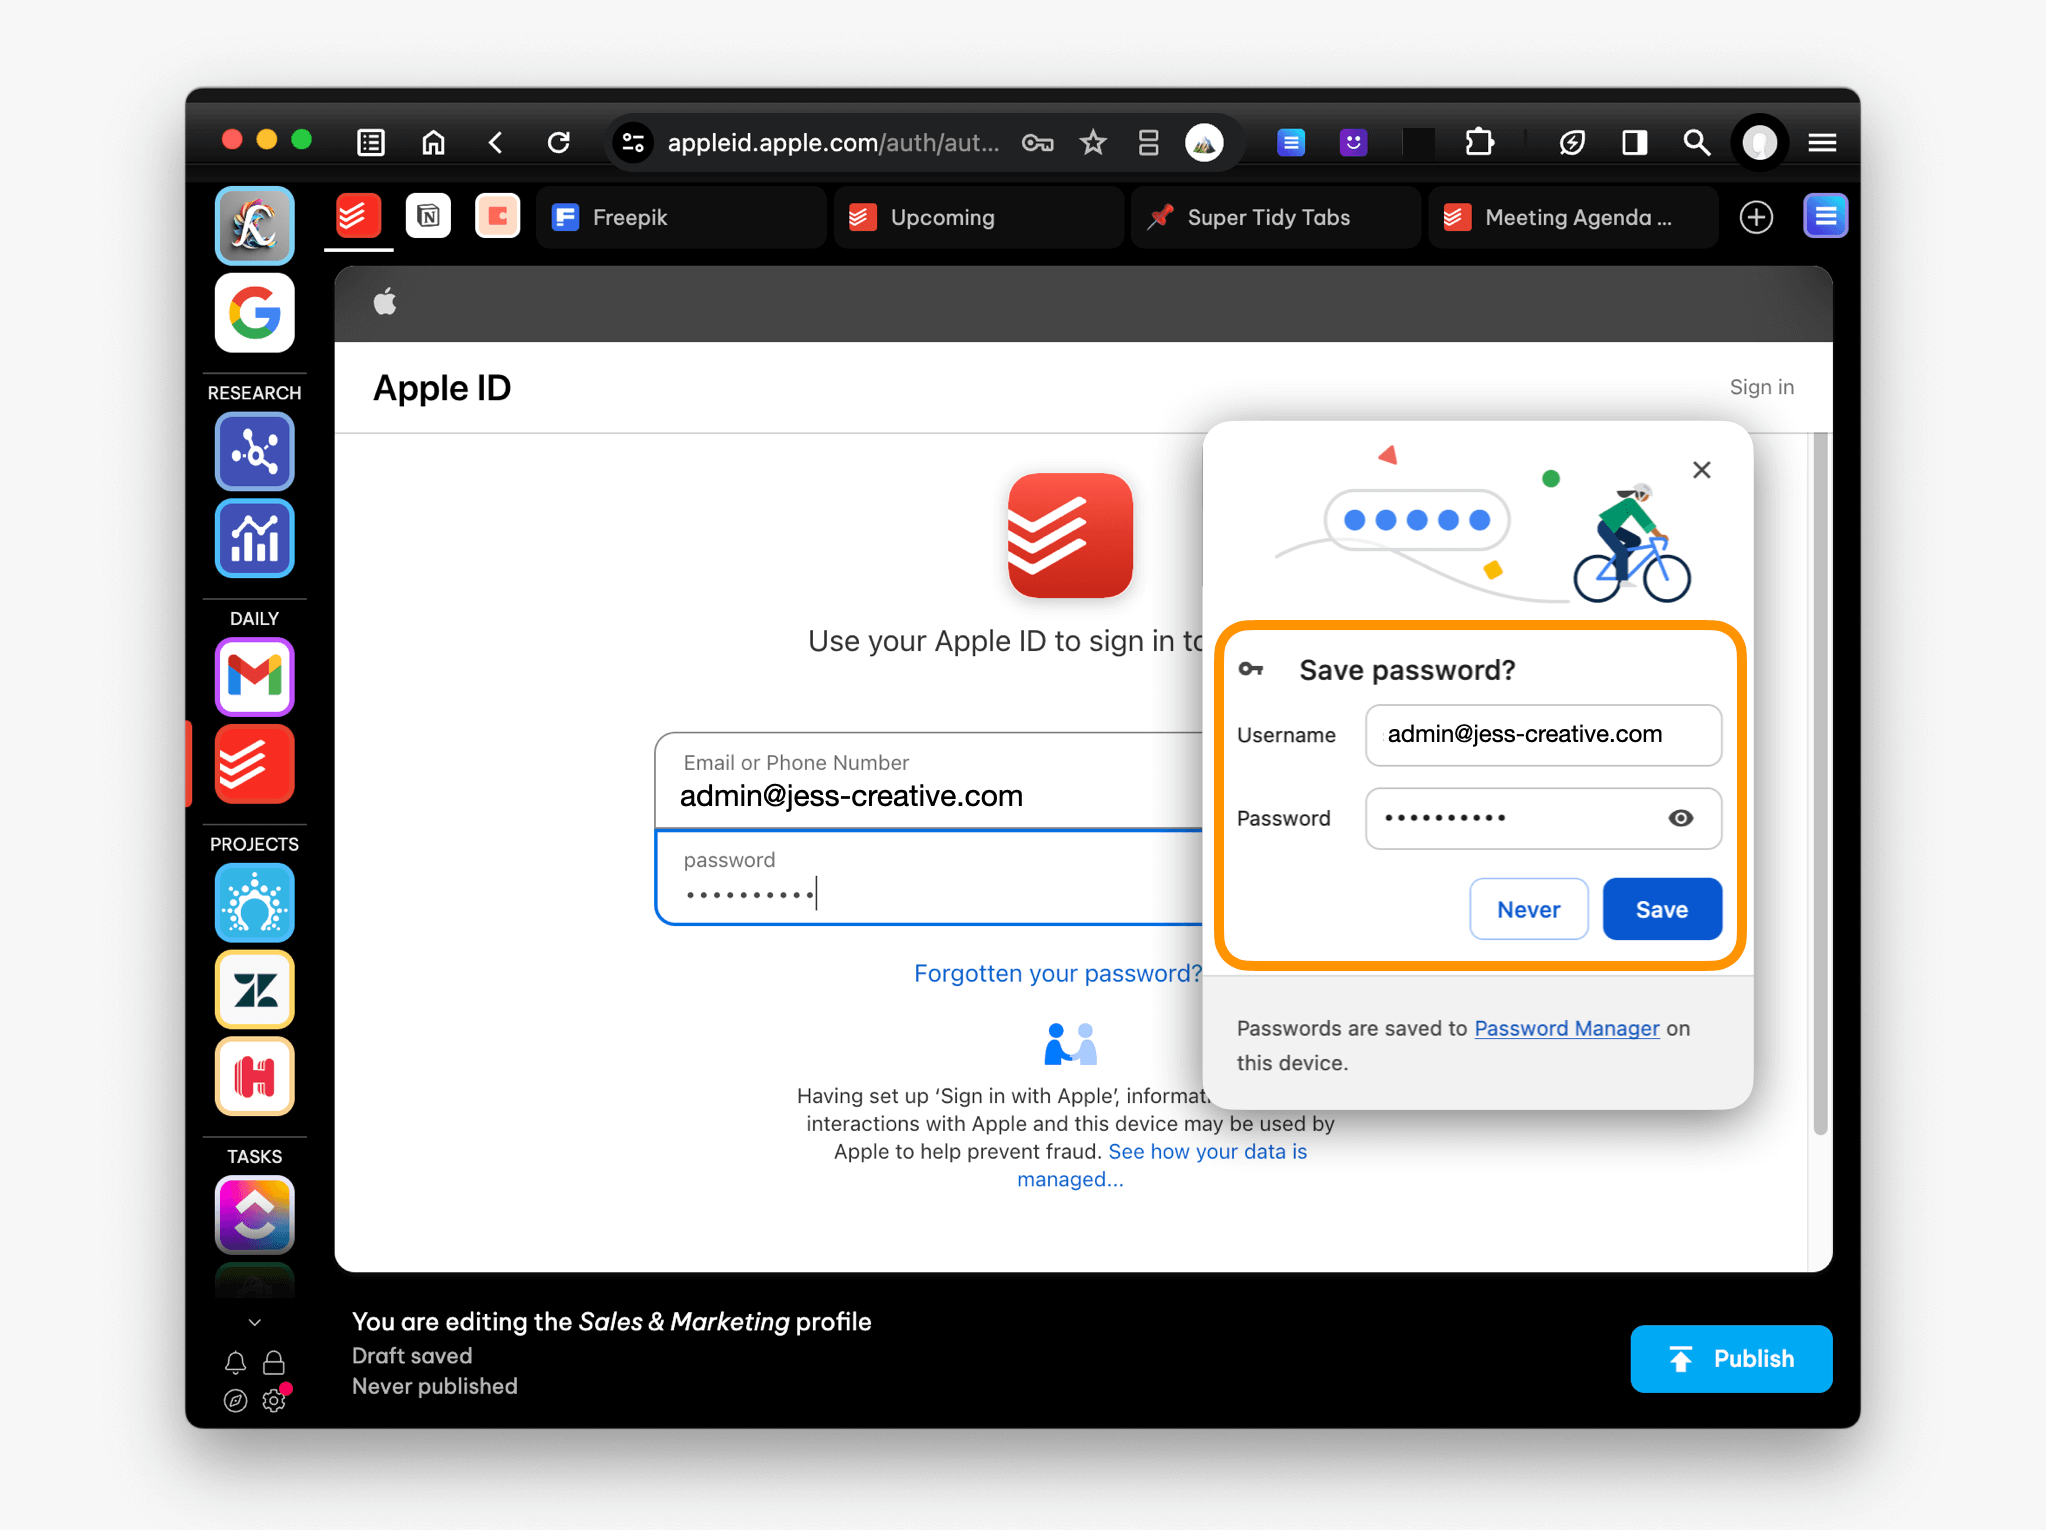
- (1) Click on each app and Login to each, saving the credentials to the Wavebox password manager.
- (2) Import passwords to Settings > Passwords and Auto-Fill > Password Manager. In the pop-up window, click on the burger menu (three lines top left) and click on Settings. Scroll down to the Import button.
- (3) Manually enter each password to Settings > Passwords and Auto-Fill > Password Manager > Add (button).
6. Enabling Passwords (Master Password)
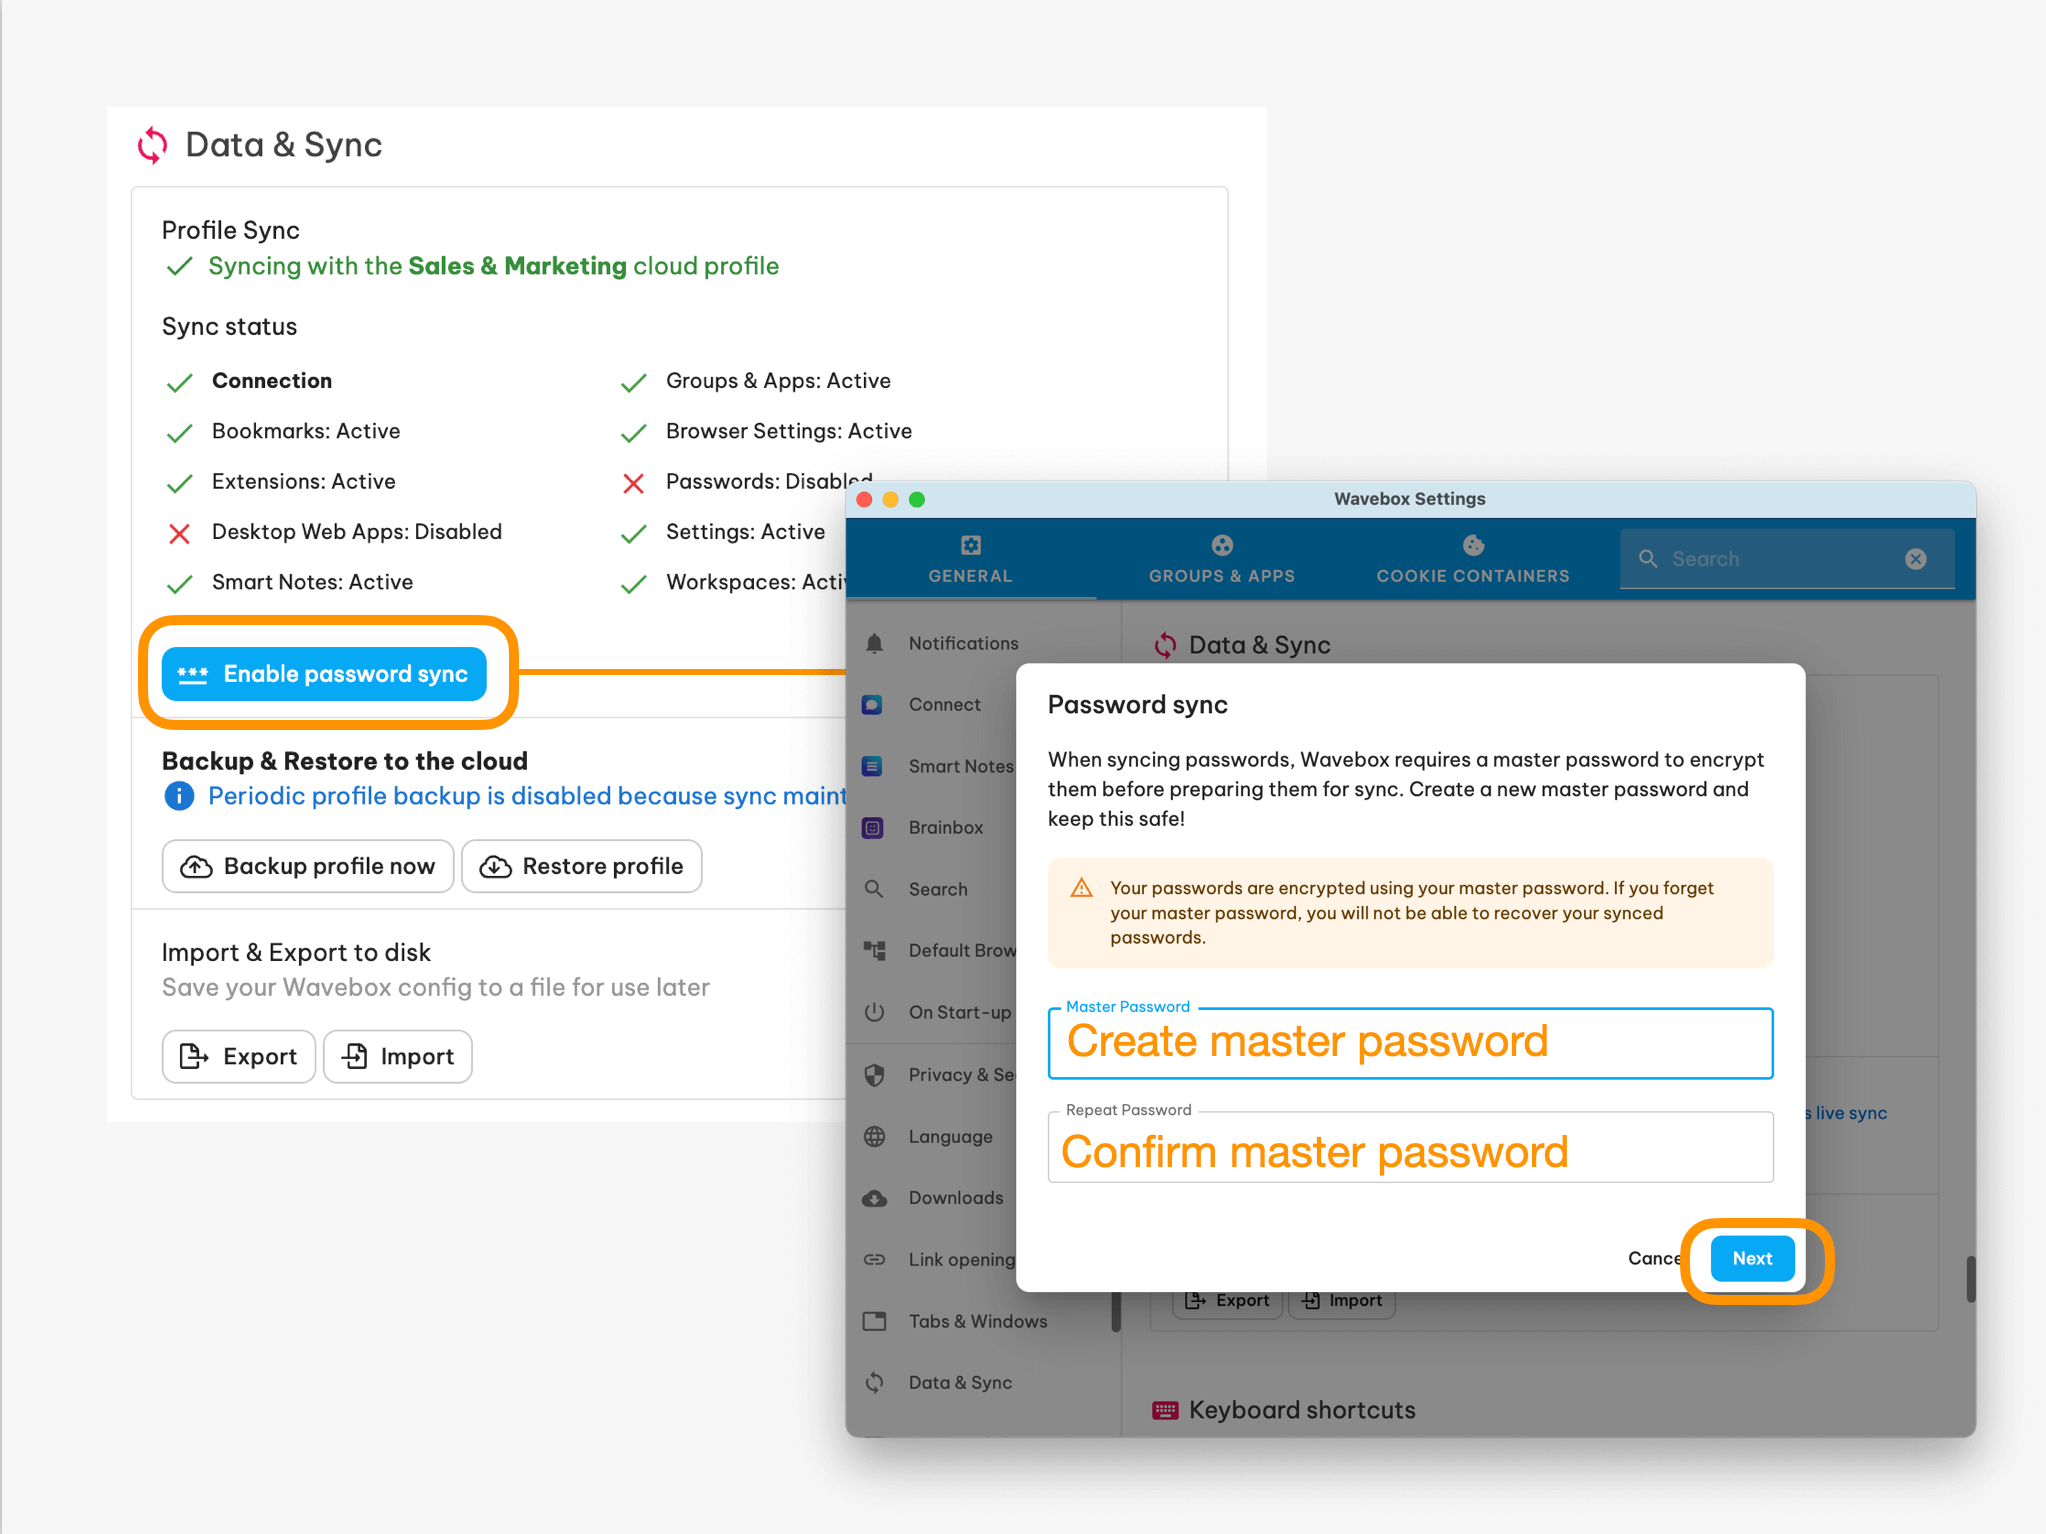
- Click on Settings > Data & Sync. Then click on Enable Password Sync and create a Master Password.
- Click on Next to see that password sync is now enabled.
7. Checking your Spaces
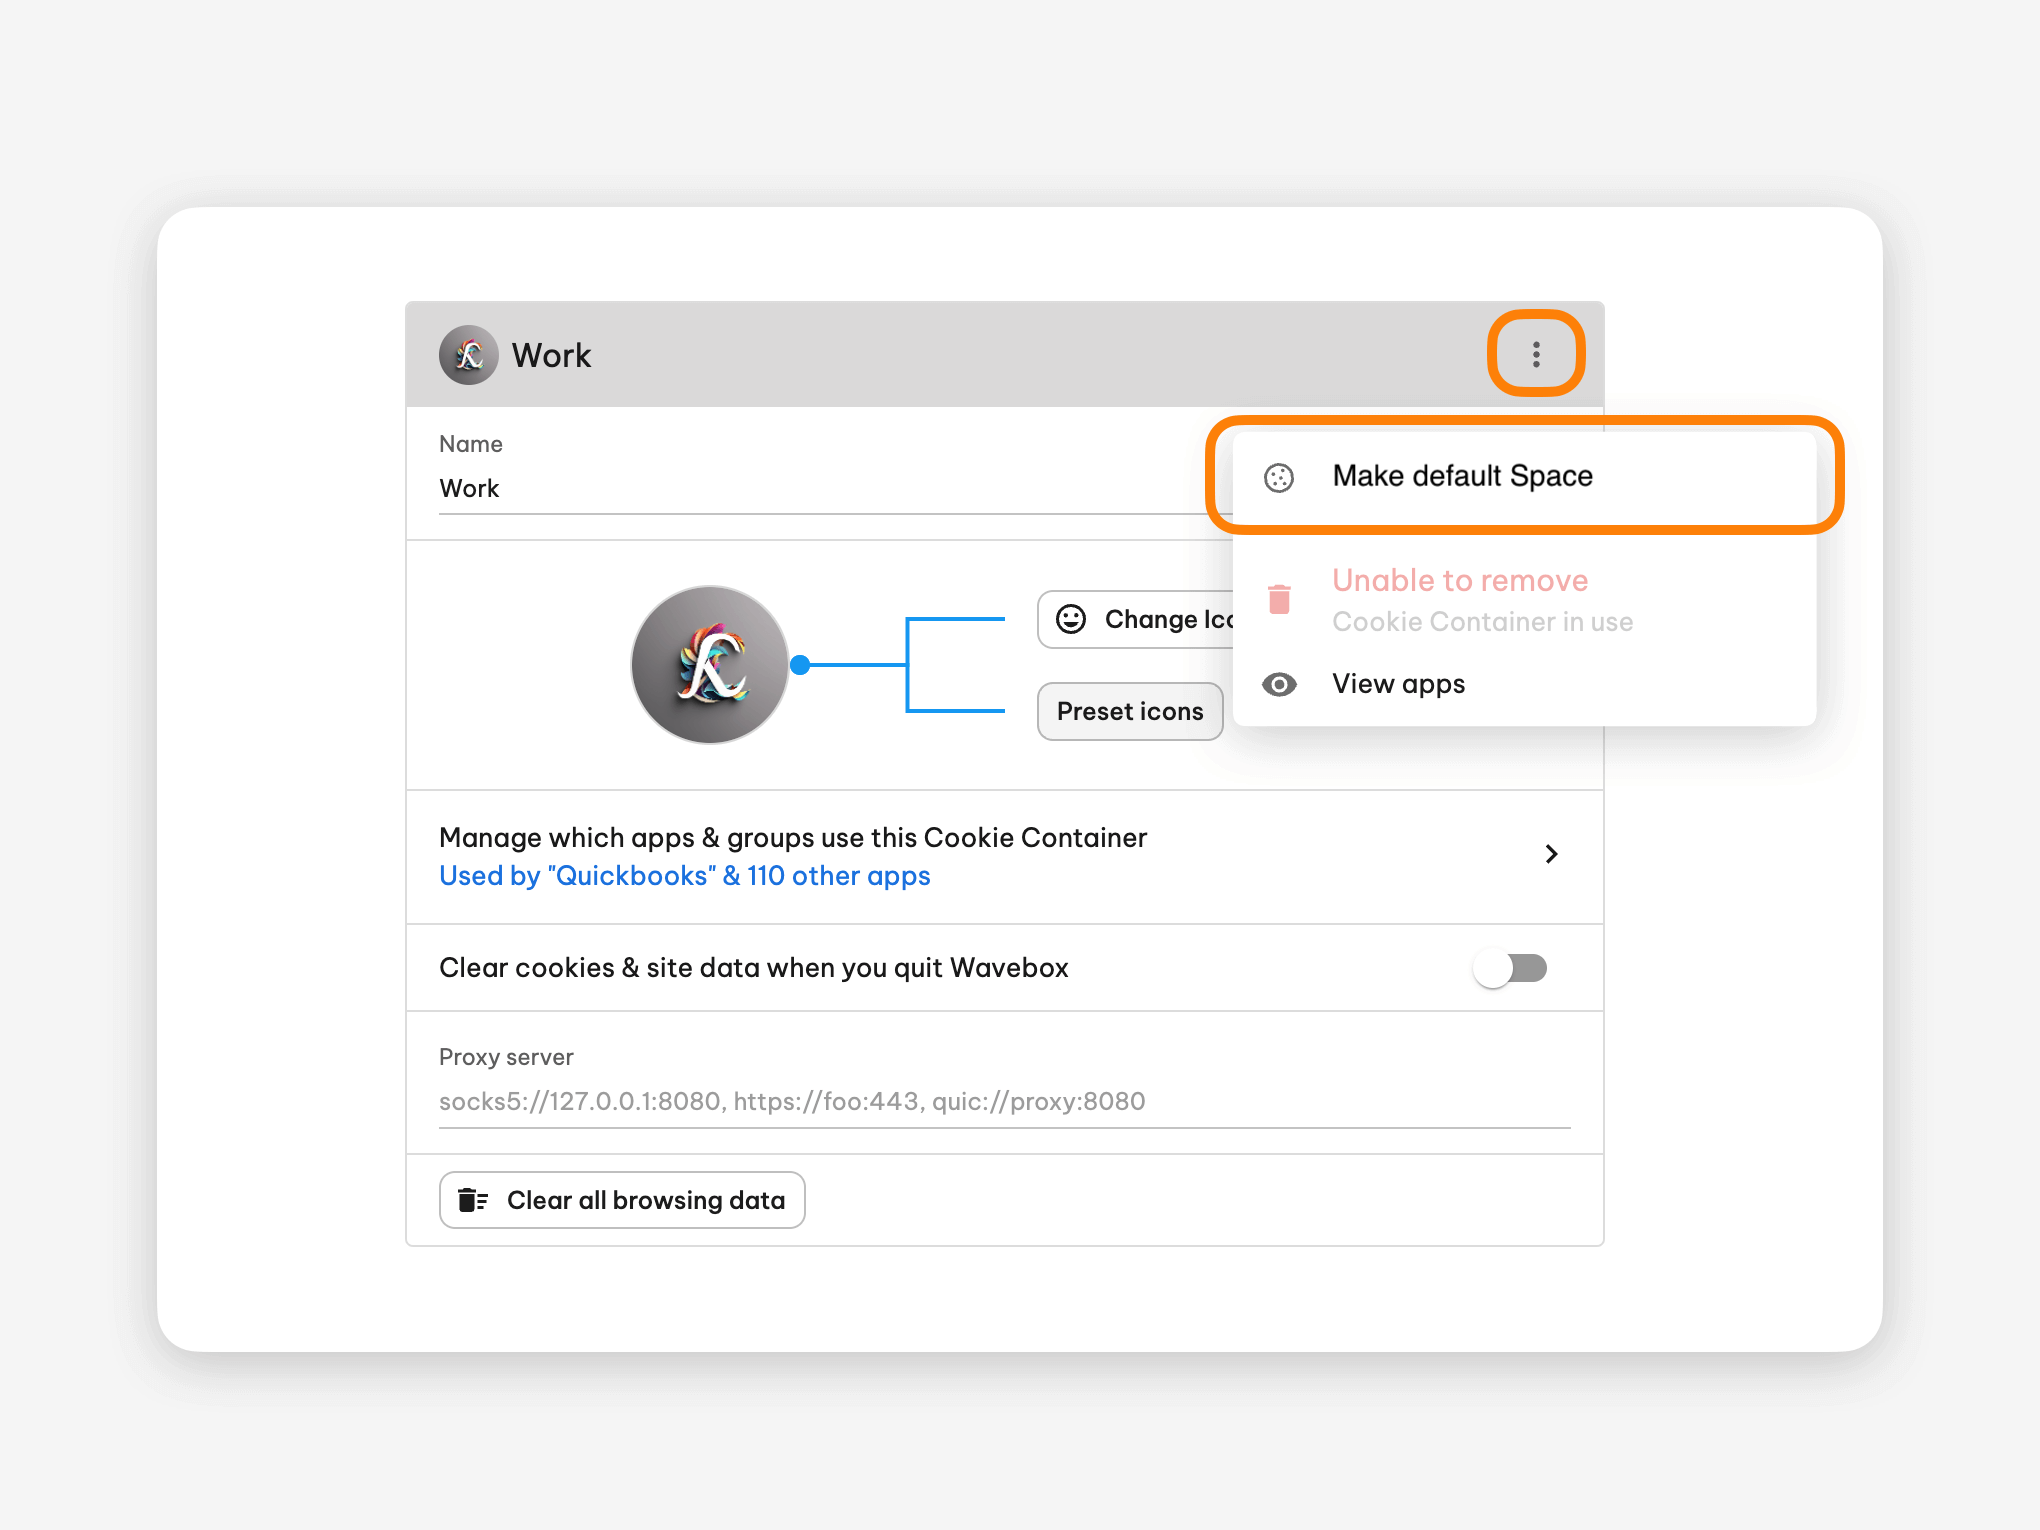
- If you used your own template for creating the Live Profile, it's worth checking your spaces. Click on Settings > Spaces and check 2 things:
- (1) Check that most of the work groups/apps are in the Default spaces. If not, find the space that most items are in, then click on the kebab menu (three dots) and choose Make default space. The space that was 'default' previously will be renamed, and you can remove it if needed.
- (2) Check that there are no other rogue spaces you don't want included e.g. Personal or Home. If you find one and apps are using it, click on the link to the Drag & Drop Space Manager to highlight the apps, and then either remove the app or change the space.
- Note that you cannot remove Connect Spaces from a copied Profile template.
8. Publishing the Profile
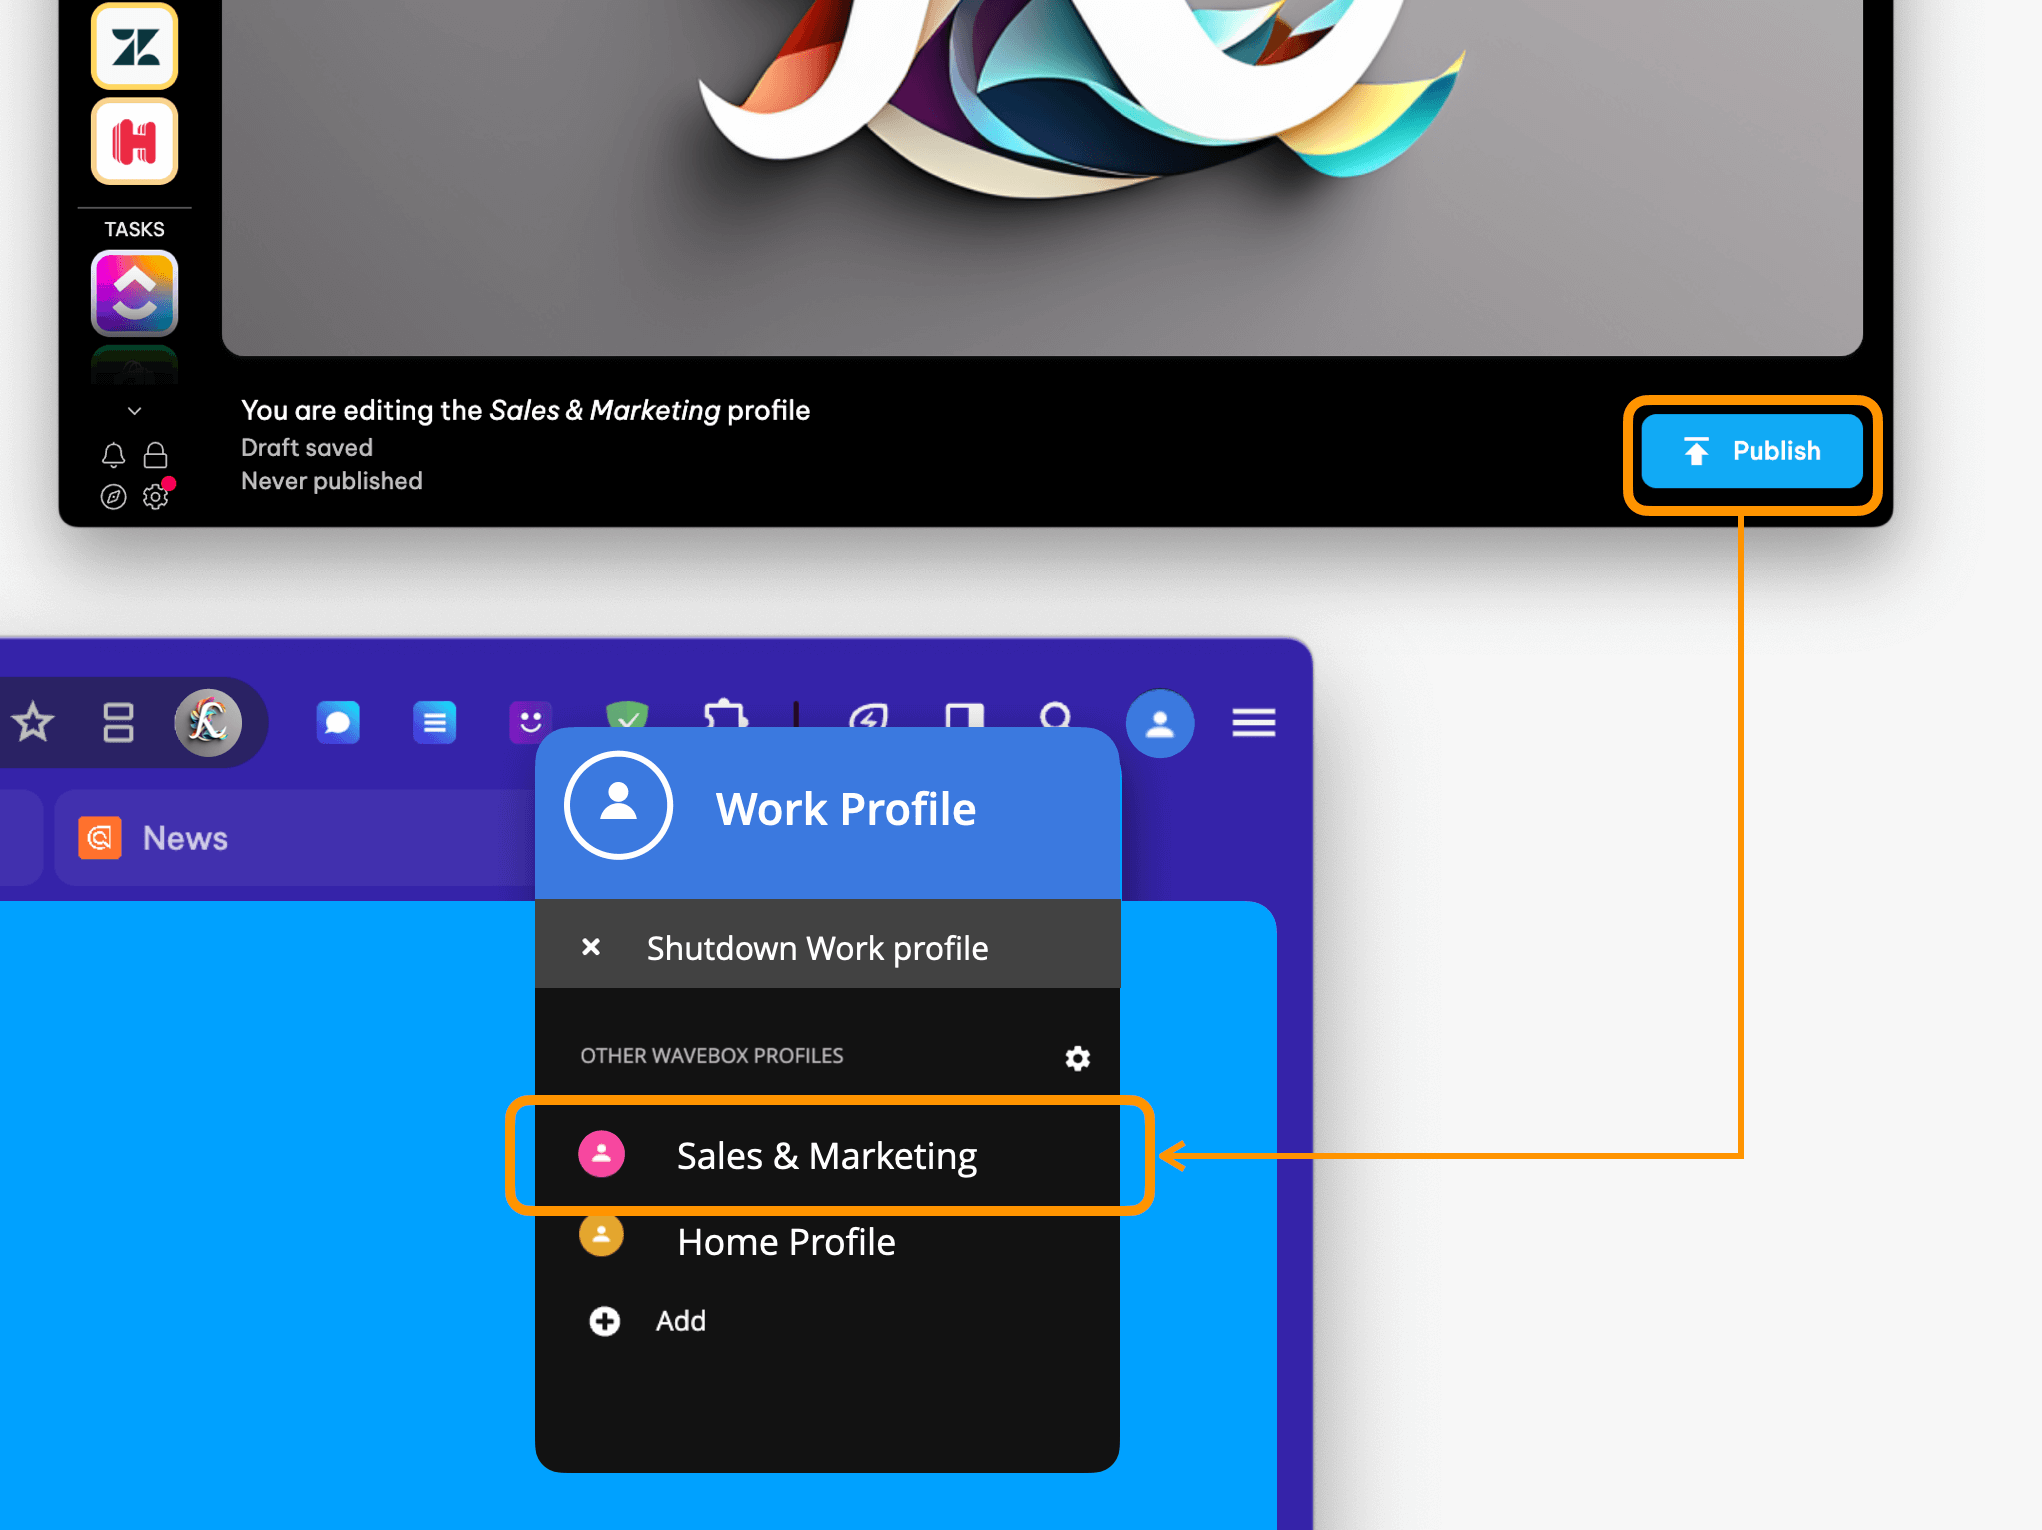
- When you are ready to share the profile with users, click Publish.
- As soon as you publish, it’s available for users to see in their profiles menu (see next step).
- You can come back to edit the profile at any time. The profile will auto-save every few seconds. Make sure you hit publish to push changes out to users.
Up Next
- How to Create a Live Profile for Your Team
- How to Onboard Users to a Live Profile.
- How to Update & Publish a Live Profile to your Team.
Need Help?
Wavebox Live is a brand-new service, so bugs are possible. Please report any bugs to support(at)wavebox.io, and we will investigate them immediately.
If you want to help test Live Profile, please send a request to support(at)wavebox.io, and we will enable it in your My Wavebox. You can easily test Live Profiles alongside existing profiles to ensure continuity during this initial trial period.